|
Dear FlyQ InSight Beta Tester,
Thank you for asking to beta test revolutionary FlyQ InSight. It's been a bit of a wait while we nailed a few last key issues. Still a few loose ends but we think it basically works and want to hear what you think. You should have received an email from Apple about it; if not, let us know and we'll see if we can resend it.
Creating augmented reality using strictly off-the-shelf hardware has a few limitations so it's very important that you read this document before using the app in-flight. The portion about how the FRONT button works (below) is especially important.
As you may remember, FlyQ InSight is the first practical augmented reality (AR) app for aviation. Using nothing other than your iPhone or iPad and the built-in camera, it shows where the airports are as viewed from inside the cockpit.
As it happens, Apple released the beta a bit before we were ready with a quick training video so, for now, here are some key points that will coalesce into a Pilot's Guide before the public release:
What is FlyQ InSight
FlyQ InSight is the first practical aviation Augmented Reality (AR) app for the iPad and iPhone. Using just the camera built into your iPad or iPhone it shows the position and distance of airports overlaid on a live image of the real world. With one click, pilots can take and share photos of their flights. It also includes all the features of FlyQ Pocket, which it replaces. That means detailed airport info, diagrams, weather, and flight planning. It has tabs along the bottom for
Camera (the AR view),
Photos, Airports, Weather, Plans, Downloads, and Settings.
|
|
| Click for a larger image. |
Like FlyQ EFB, the tab bar disappears after a few seconds and a tap anywhere on the screen brings it back. You can also have the tab bar always stay on the screen via a switch in
Settings.
FlyQ InSight is absolutely free. It's meant to compliment, not replace, full-featured EFB apps such as FlyQ EFB, ForeFlight, Garmin Pilot, etc. Typically pilots use FlyQ InSight on their phones because phones are easily moved around the cockpit and run their EFB on an iPad.
Required Hardware and OS
- iPhone 5 or better
- iPad 2 / original iPad mini or better (iPad Air or iPad mini 2 or better preferred)
- External Bluetooth GPS if using a WiFi-only iPad. A Dual XGPS 170 or 190 ADS-B receiver also works as a GPS source but no other ADS-B GPS source is currently supported.
- iOS 8.0 or better
Using the Camera (Augmented Reality) Tab
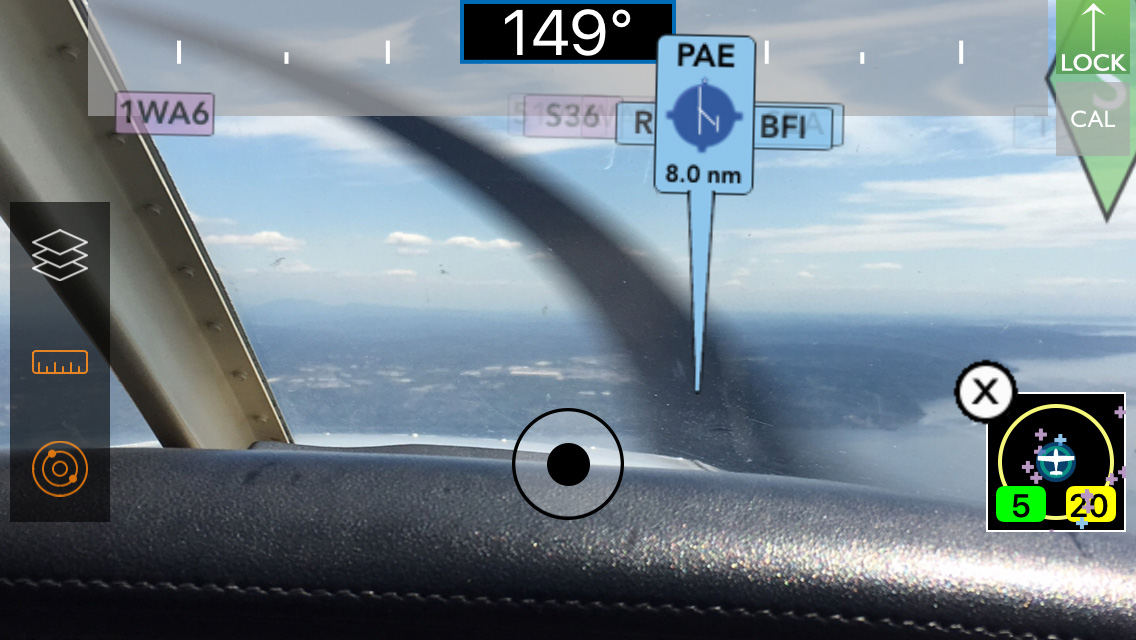
Point the rear camera of your iPad or iPhone towards airports and FlyQ InSight draws markers where the airports would be if you could see them. The marker sticks are color coded like the airport icons in FlyQ EFB: Blue = controlled airport, Magenta = uncontrolled. The markers also show the runway diagrams from a north-up perspective and the distance to each airport. You can select which types of airports are shown with the
Layers button explained below.
|
|
| Click for a larger image. |
Nearby airports are shown with a "stick" that points to the airport's location. Further away airports do not have a stick so as not to create visual clutter. Distant airports begin to fade-out the further away they are. Tap an airport marker to see more info about the airport (runways, frequencies, weather, etc.).
See something interesting? Click the
Shutter (black dot icon) in the lower center of the screen to snap a photo. You'll actually get two photos per click -- one with all the markers you see on the screen and one "clean" image with no markers. Use the
Photos tab to view and share them (Facebook, Instagram, email, etc.)
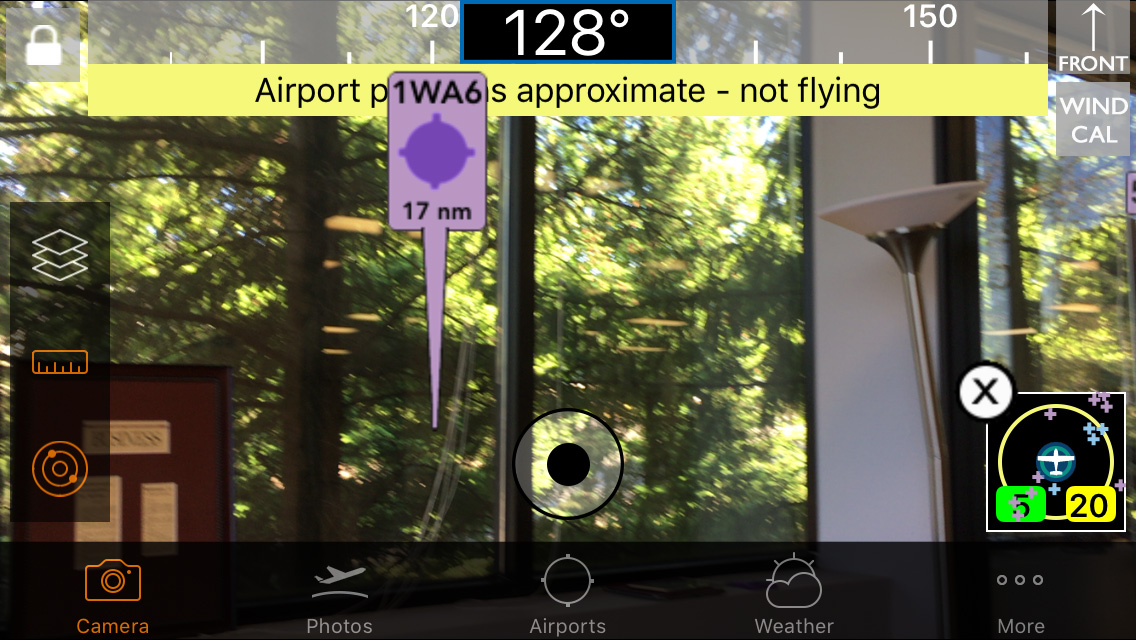
Accuracy
The app uses the sensors in your device to determine location, yaw (lateral direction), pitch, and roll. When not moving, that means yaw is determined solely by the compass in your device. The compass isn't very accurate so using the app while at your desk will give you a sense of how the app works but can't accurately display airports. The
FRONT and
WIND CAL buttons, explained below, dramatically increase accuracy but the app can only show approximate locations so do not rely on it for absolute accuracy. The sensors in your iPad and iPhone were never designed for the tricky physical, magnetic, and electrical environment of your plane.
The
FRONT and
WIND CAL Buttons
|
|
| Click for a larger image. |
The
FRONT button at the upper right of the screen helps calibrate lateral position. It has 3 modes: clear (off), yellow (medium accuracy), and green (highest accuracy).
When you start the app, it doesn't know which way is front so the
FRONT button is clear (Off). In this case, the compass (magnetometer) in your device determines direction. The compass is highly affected by the magnetic and electrical "noise" so isn't especially reliable.
Yellow Mode
When moving, point the camera straight out the front of the plane and click
FRONT. That tells the app which way is forward and calibrates the systems. The button turns yellow to indicate some position accuracy. You can move the iPad/iPhone left and right to see airports to the side or behind you. Over time (like a couple of minutes), this accuracy will decrease as the device sensors drift so you may want to re-center the device and click
FRONT every once in a while.
Green Mode
For better accuracy, you can lock the camera to the front position. This tells the system to always assume the device is pointed straight outside and ignore the device's gyros and compass. Press and hold
FRONT for a few seconds and the button turns green to indicate that it's locked to the front position. In this mode, rotating the device left or right has no effect; the app assumes it's looking straight outside so always shows airports directly in front of you. The accuracy is very stable as it does not use gyros or compass in your device, relying solely on your GPS track.
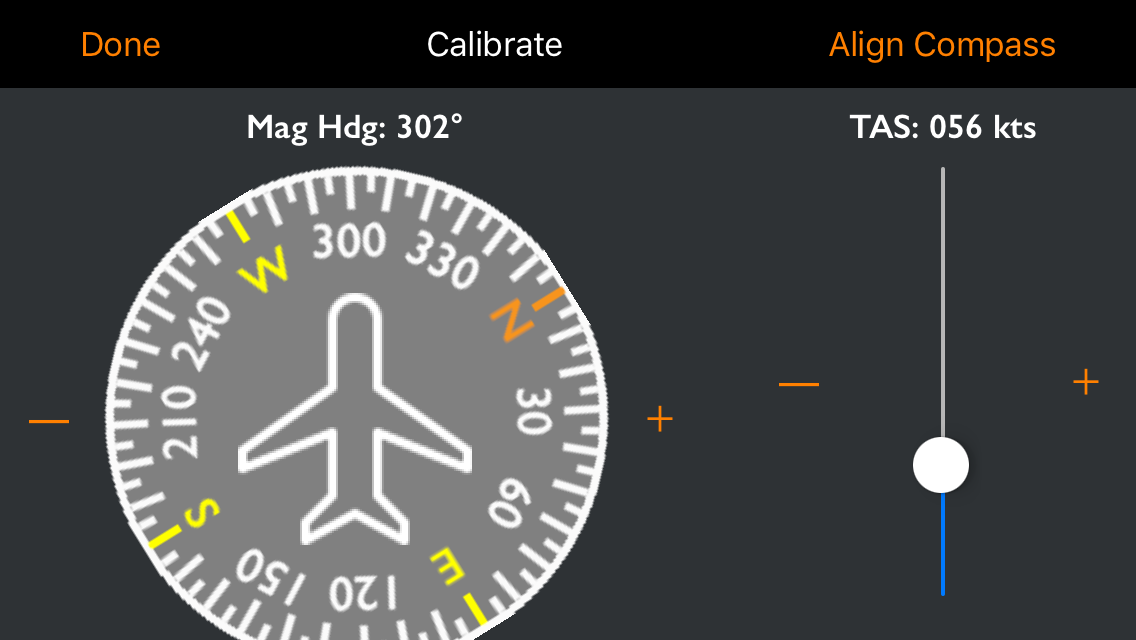
WIND CAL (Wind Calibrate)
|
|
| Click for a larger image. |
For best accuracy that compensates for winds aloft, fly straight and level then hold the rear camera straight out the front window and press the
WIND CAL button. Use the slider and + and - buttons to enter your current TAS. Spin the Compass Card to set the magnetic heading. These let FlyQ calculate the wind vector so it can compensate correctly no matter which direction the iPad/iPhone is facing. You only need to redo this step if the winds have changed due to a large altitude change, a long distance travelled, or a large passage of time.
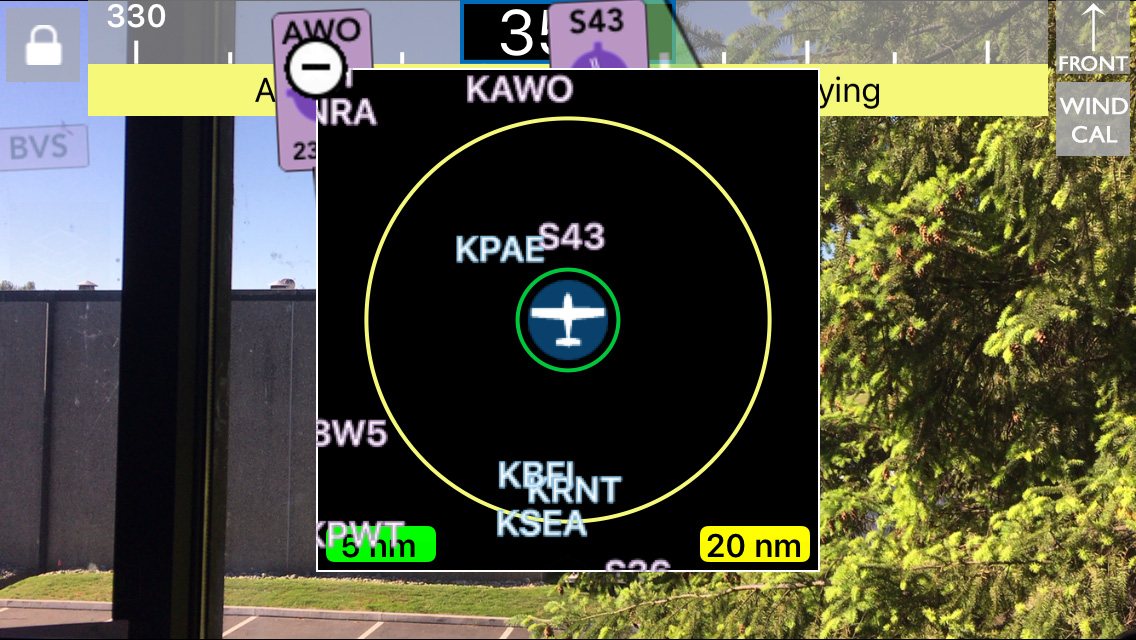
2D "Radar" View
|
|
| Click for a larger image. |
The lower right corner of the screen has a small view that shows airports relative to your current heading from a "heads up" 360 degree view. Tap to see this view larger. The Radar View has green and yellow ring to help you judge distance. Green is 5 NM, yellow is 20 NM. Tap an airport in the Radar view to see more info. Tap off the Radar view or click the - in the upper left corner to "shrink" it back. When minimized, click the X button to close it. Use the Radar icon on the left toolbar to show or hide the Radar view.
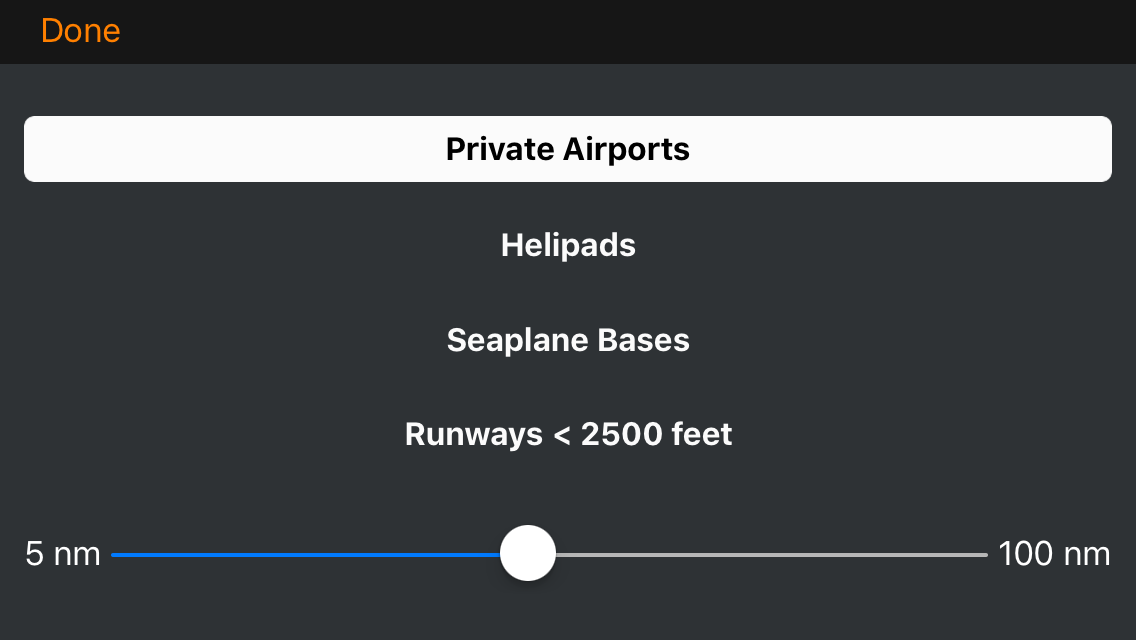
Filter
|
|
| Click for a larger image. |
Click the
Layers(stack of papers) icon on the left toolbar to select which airports are shown. Public land airports are always shown. Select
Private,
Helipads, and
Seaplane Bases to show more airports. Select
Runways < 2500 feet to show smaller airports. Use the slider to determine how far close airports must be in order to appear on the display.
Lock Button (padlock icon)
During flight testing, we found that we often hit the tab bar when holding the device, thus switching off the
Camera tab. Click the
Lock button at the upper left to disable the tab bar.
|