| |
|
| Christine's Color Connection |
|
| A newsletter for quilters in love with color |
July 2017 |
|
The Quilter's Color Club has lots of info on every aspect of color. You can find my book on my
website
|
|
Sizzling Summer!
It's been a busy few months for me, and whew, I'm just now catching up. From early April to late June my workshops and lectures took me to San Diego, Arroyo Grande, Santa Cruz, Merced, and San Francisco, CA, plus Naples, Florida. My students were fabulous as always, but I must say, it's great to be home.
Note: If you don't already receive our Artistic Alchemy blog, you might like to check out my post today on an entirely different subject.

|
|
| |
|
"Best Friends"--A New Colorful Quilt
First things first:
I hope you'll read all the way to the end, where I've posted info on my upcoming online class.
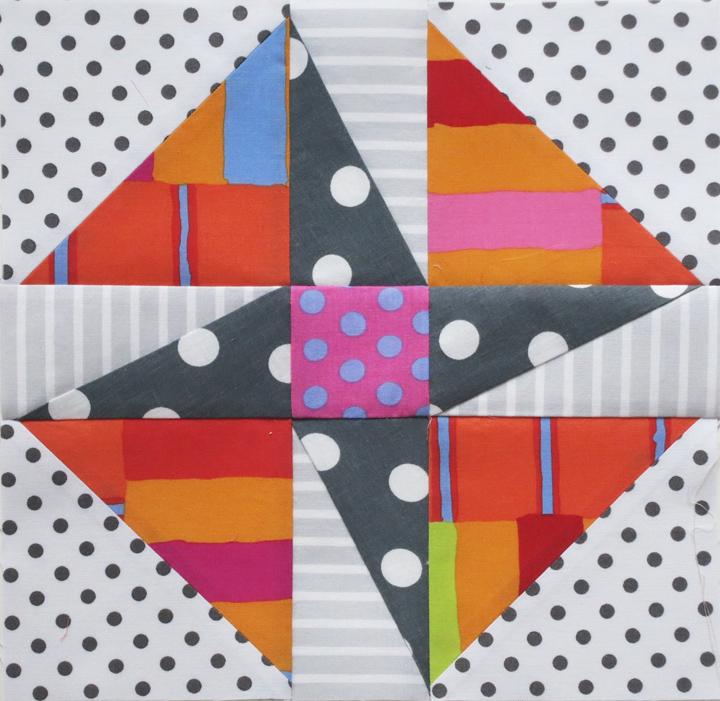
In my last newsletter I showed you one of the blocks from a quilt for our Zephyr retreat. The block goes by several names (Gypsy Wife, Crazy Anne, probably others), but I knew I would rename my quilt. I eliminated the corner squares in the original version to open up and simplify the design.
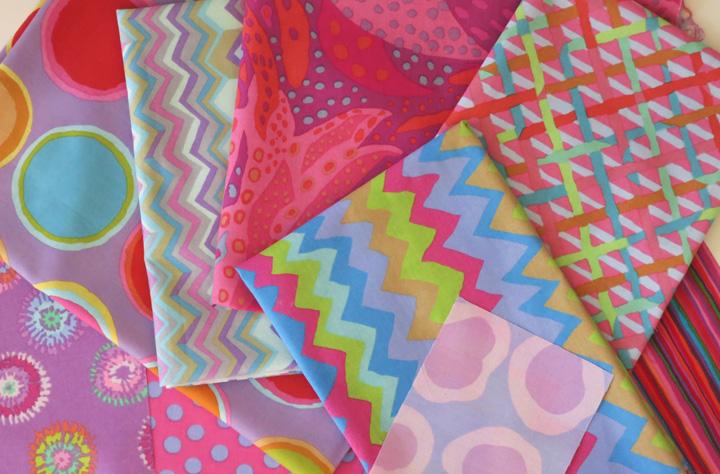
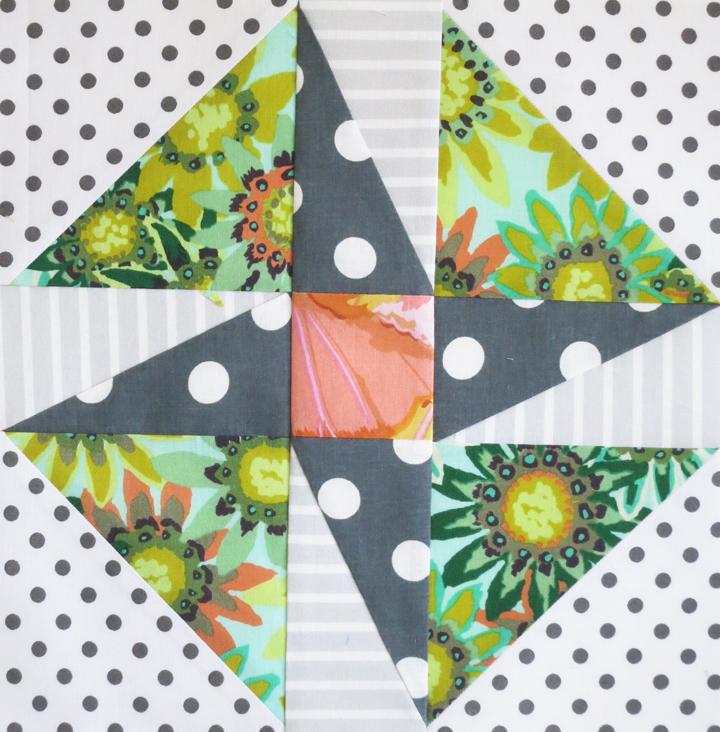
It started with Kaffe Fassett Collective prints (yum!) for the large triangles and the center squares.
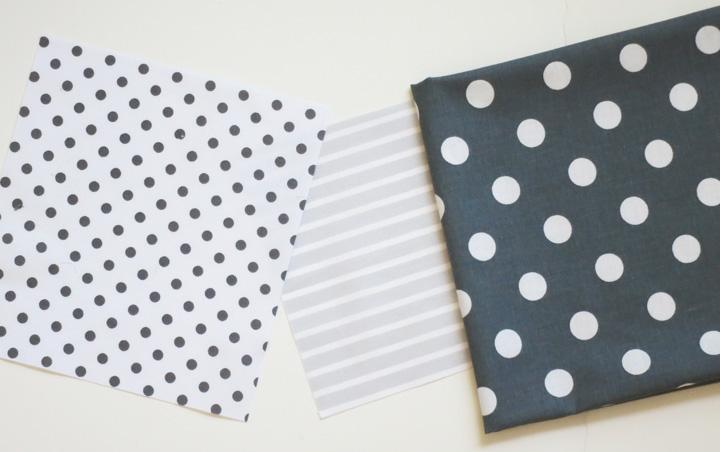
For the supporting fabrics,I chose a a smaller gray-and-white dot ("Dumb Dot" by Michael Miller), a subtle gray-and-white stripe, and a large gray-and-white dot. (I don't have selvage info on the last two fabrics; sorry)
I played with these ingredients to make the block design read, and the prints, stripes, and dots separate visually. After one block, I was hooked!
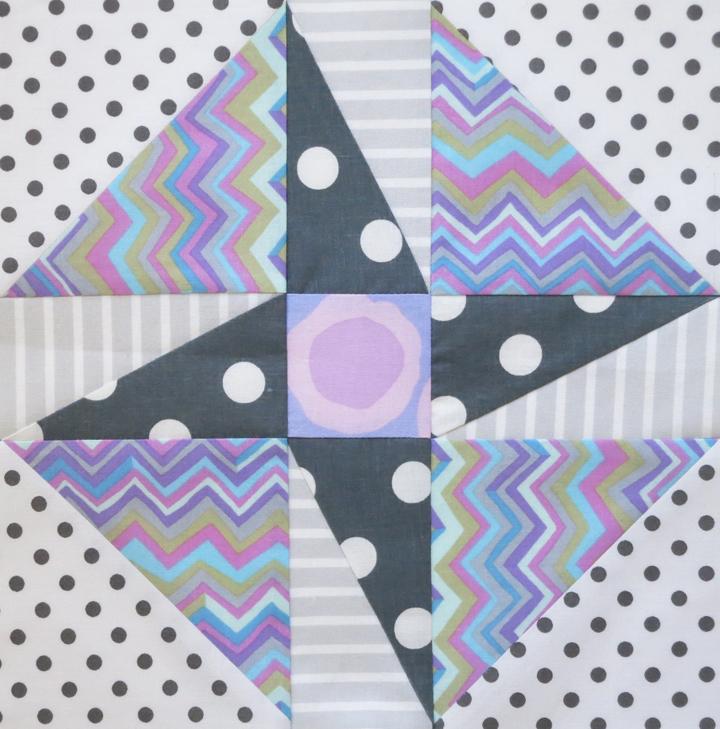
A fussy-cut center gives the eye a place to rest in this cool block.
This Kaffe Gazania print was a gift from a student (one of the perks of being a teacher). Notice that the smaller gray dots are not chopped up by the diagonal seams; more about that later.
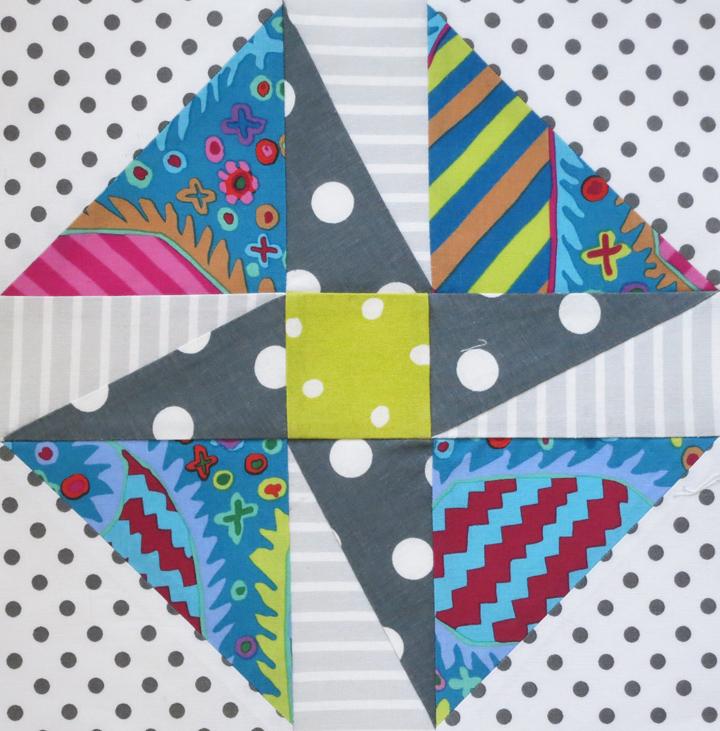
"Turquoise Heraldic Stripe" by Kaffe didn't make it into the quilt, but I like it just as much as those that did.
Another gift from a student, an older Kaffe print.
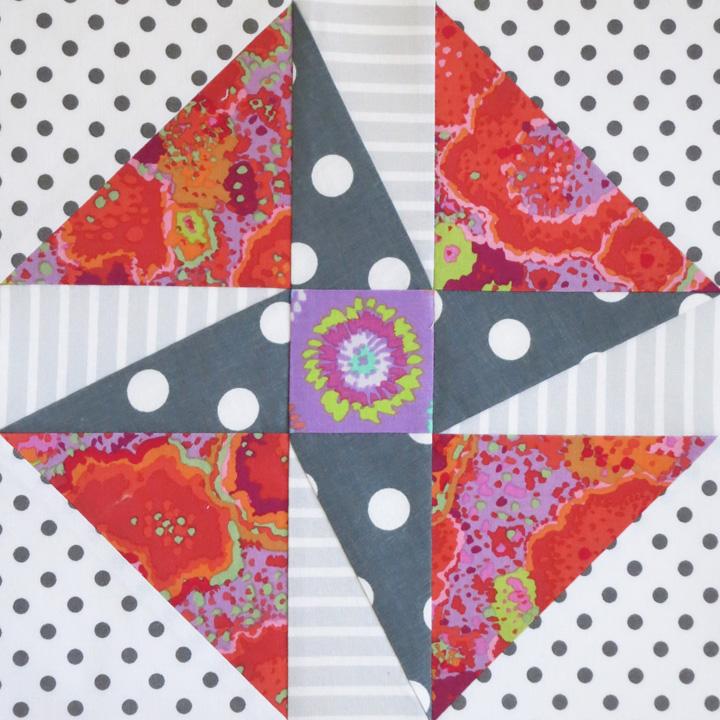
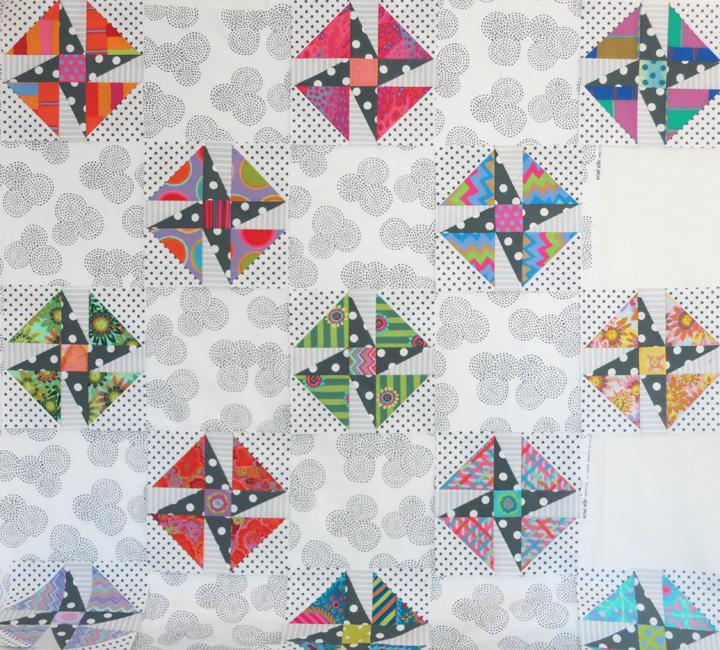
Then came the biggest challenge: How to set them? Block-to-block was dynamic, but the points would touch when the blocks were joined (shown here are the raw blocks), and I wanted each block to stand alone. Also, there would be "unpleasant" bulk where the points meet, something I avoid whenever possible! 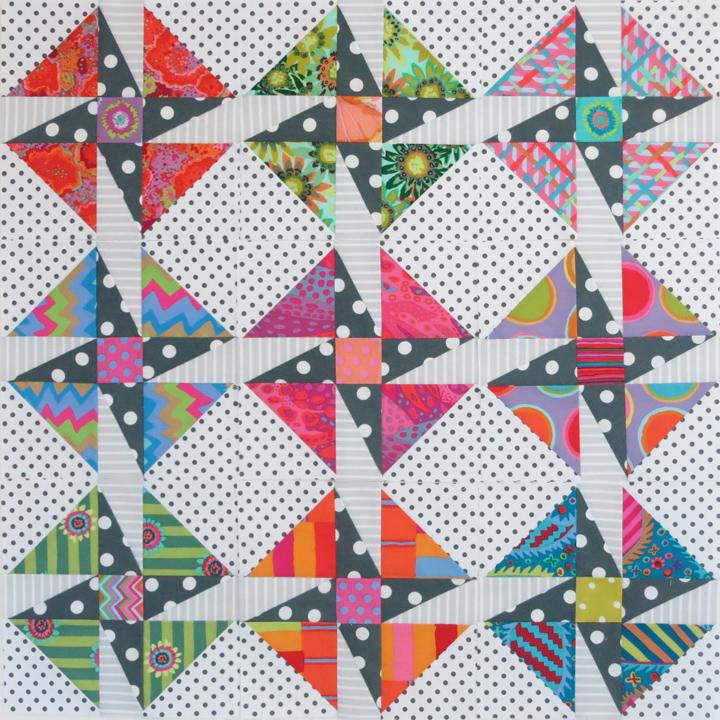
Time to audition a few options. I can't emphasize enough the importance of this step when considering a sashing or alternate-block fabric. It can make or break your quilt.
First I tried alternate blocks cut from Michael Miller's "Stitch Circle" dot in gray on white. Light-and-airy for sure, but the dotted triangles in the blocks are lost, and the blocks are dwarfed by the alternate squares.
Next, 2-inch-wide sashing strips cut from the same Michael Miller fabric. I liked this option a lot, but the two gray-and-white fabrics didn't quite separate enough. On the plus side, it's a quiet, minimal look and a nice balance to the high-energy blocks.
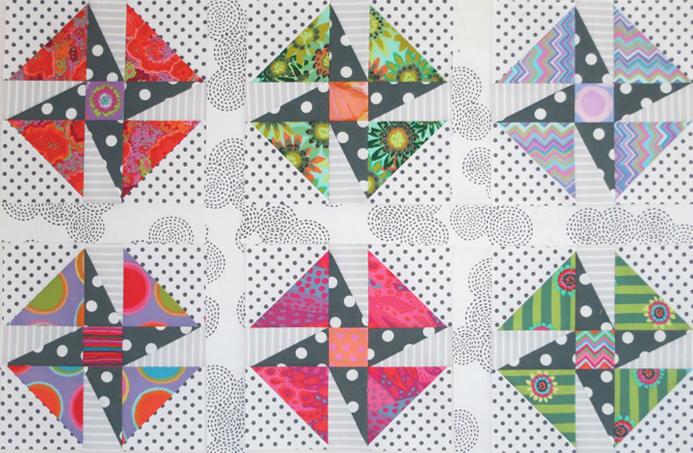
It was time to try something different. When in doubt, look to your black-and-white dots.
These dots are rather widely spaced, making it possible to cut 2-inch strips that finish to 1½ inches wide. (Pen is for scale.) 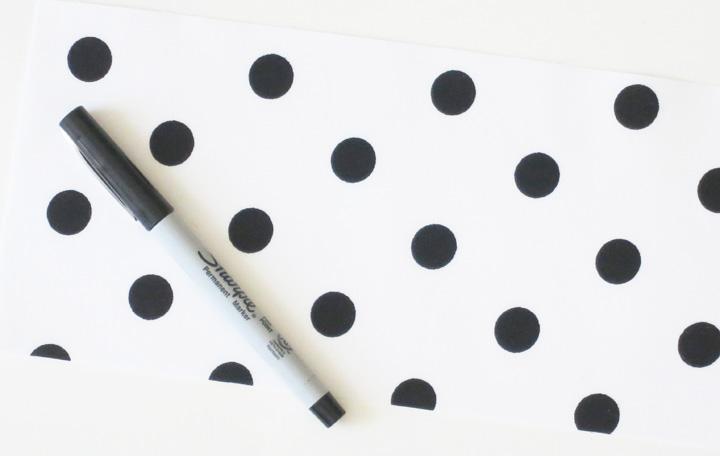
The result? A lively design that's almost too busy for me, yet showcases the fabulous prints in each block. Notice that I used small setting squares between the sashing strips. (I had my reasons.)
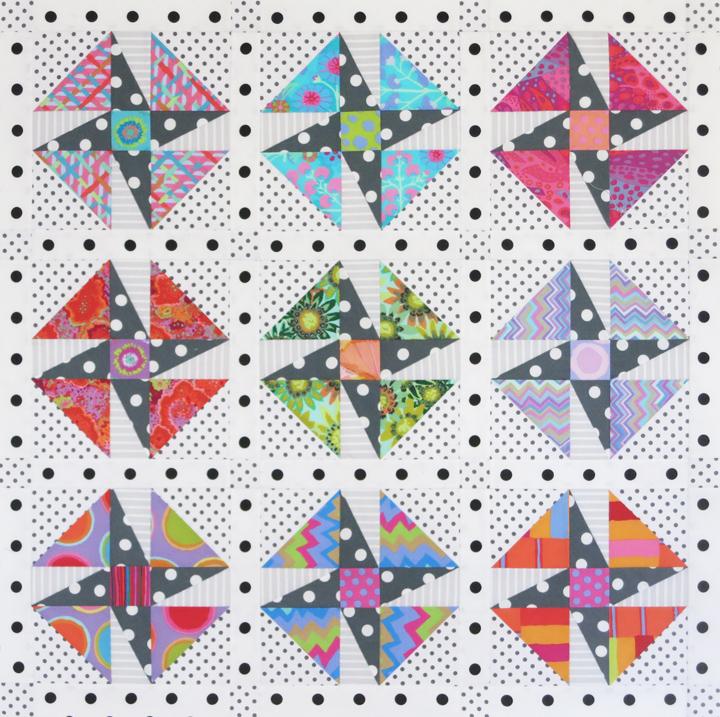
And I named my quilt "Best Friends" because the blocks are different colors, yet they have much in common, and they all get along!
But Wait . . . It's a Class!
Yes, it's an online class in the making. This is a new adventure for me, and I hope you'll come along for the ride. Here's a brief look at what you'll get when you join.
* An in-depth discussion of choosing fabrics for color, value, pattern, and scale. I'll show you fabrics I auditioned and rejected, and why. This step is essential for success!
* What to look for in a small dotted fabric to prevent the dots from being "chopped" when the triangles are sewn.
* Step-by-step video lessons shot in my studio on fabric cutting and block construction, in particular the paper piecing of the skinny triangles. (There was no way I would piece those triangles the traditional way!)
* Downloadable PDF that includes the supply list, step-by-step piecing directions, and illustrations. In effect, you'll have the complete pattern as part of the class.
* PDF paper-piecing sheet (six units per page) for the skinny triangles.
* PDF cutting guide/template for the skinny triangles. My method makes the most economical use of the fabrics, and, more important, puts the bias edge on the diagonal of the unit, leaving the outer edges on the straight-of-grain. More about this in the free intro video.
* Examples of blocks made using different kinds of fabrics (stripes, stylized, geometric, etc.). With this block, the options are endless.
I don't yet have a firm date for when it will be available, but I'll post a link to the intro video in my next newsletter. Or, email me to be added to the list of interested quilters.
With that I leave you. I hope you enjoyed meeting my new "best friends" and will think about using favorite fabrics to make your own quilt. Keep cool in this sizzling summer and spend some quality time with your fabrics, in your sewing space!
|
| About This Newsletter If you've received this newsletter, you may have attended one of my workshops or bought one of my books, patterns, or color wheels. It's easy to opt out, below, but I hope you'll stick around to see what's in store. It's all about color, using it, enjoying it, and sharing it with other quilters. Thank you! |
|
| Contact Info Christine Barnes cebarnes@sbcglobal.net
www.christinebarnes.com |
|
|