Escrow Pay Options Coming to the Web
|
|
|
 |

Many of you are using Student Manager's Escrow option to facilitate refunds and payment transfers. However, support for this feature under ACEweb has been rather limited. There's a template expression that will let your students see their escrow balances, but there has not been a way for them to actually use those funds for online registrations. Any such transactions had to be done by office staff. But that's about to change!
The 2020 ACEweb Conference Release, available later this month, will include a new INI setting called EscrowPayments, a numerical flag which can have one of 3 settings:
0: Escrow balances can be displayed but not accessed online (the status quo)
1: Escrow can be used to pay online, but only if the balance will completely cover the cost of all courses in the cart.
2: Escrow funds can be applied to any online transaction. Once Escrow is used up, the student must use a credit card to cover any unpaid remainder.
With the Escrow feature enabled, students who have an available credit will be able to select Escrow payments as a checkout option. Note that with setting #2, it's always possible that a credit card payment will be declined, cancelled, or otherwise fail. If that happens, you will likely find a mix of courses on the cart. Those entirely paid by escrow will be marked as completed registrations. If a course was partly covered by escrow, the registration record will be active and the remaining amount will be converted into a billing which they will need to pay before taking the class. Any additional unpaid cart items will simply be dumped and the registration will not be allowed.
There's also a new setting for situations where institutional policy requires that escrow balances be used within a certain period of time. You can set EscrowCutoff to represent the number of days after which escrow records will "expire" - so those amounts cannot be applied to payments (nor will they be added to the displayed balance). For example, setting EscrowCutoff=365 will ensure that students can only use records from the past year for the escrow options. (Setting that entry to zero will result in balances remaining active indefinitely.)
If these features sound like they might benefit your operations, watch for the next ACEweb release announcement. Your tech can assist you with getting it installed and configured to use the new online escrow capabilities.
Contributed by Stein Goering
|
|
| ACEware's 2020 Conference a Great Success! |
|
|
We were so encouraged by the participation from the 149 registrants during our June 1-5 week of learning and sharing! We are thrilled with the number of takeaways and positive comments you shared!
If you were't able to attend, the recordings are saved
here for review.
The top takeaways shared by attendees included:
- Availability of Screen Layouts in the Online Help Guide (Useful when building reports!)
- Using Ctrl + T in a course to copy email addresses
- The SOP Template available from ACEware
- Hearing how schools were managing online programs
- The step by step directions for using Pocket Ledger
- How to refund to escrow
- That we can include images in our emails - that there are multiple templates!
And, "we are under-utilizing our software!" This, we hear every year after conference. User webinars are provided each month to help with knowing all about your software. Plus, a
ll webinars are archived so that you can access them on-demand.
When you have a, "Can ACEware do this?" question, get with your tech and ask, because there is probably a way to get it done! (If not, it may end up as a wish so it can do it later down the road.)
Thanks for joining us this month. See you in July for our
update webinar (discussing all that's new since April in Student Manager and ACEweb) and our user webinar on
The New Generation of F Keys!
Contributed by Sharon Brookshire
|
|
|
Tip of the Month:
Current Directory (.\)
|
No, that isn't some emoticon in the title. The .\ in the Windows world is the current directory being worked in. This becomes important in several areas in Student Manager.
One issue we see from time to time is with course attachments, but really any document in the system, is that some people can't access certain documents. If everyone isn't mapped to the Manager directory the same way, this becomes a problem. Also keep in mind that ACEweb would also need the same mapping on the DataPath setting in the aceweb.ini. Failure to do this may mean attachments don't go out. So, be sure to put documents into a sub-folder and map everyone the same way. If it isn't possible to map everyone, then .\ becomes your friend.
Let's look at an example: If you have Manager as X:\manager8\ and attachments in a sub-folder called attachments, then you would put on the course attachment X:\manager8\attachments\someimportantdocument.blah. Yet, your students don't get the attachment when they register and you keep getting an ACEweb Error Notification that File is Not Found. In this case, you are running into an issue where ACEweb has no idea what X:\ even is. So change the attachment to .\attachments\someimportantdocument.blah. It'll then go out.
What if you have multiple attachments and they are fairly lengthy? We do allow 250 characters in that field. But, .\ is a little shorter than X:\manager8\, so it does save you some space. It might be just enough to allow you to fit one more attachment than you could have otherwise. Heck, if you are mapped with an UNC path like \\uberservername\managerlongdirectoryname\, then .\ is going to save you a ton of characters!
Oh, and by the way, if you add attachment files from the ellipses button (...) next to the coures attachment field, then it doesn't even put a path if you are grabbing from anywhere in the Manager folder hierarchy. This is another space saver, as Student Manager knows that .\ is implied in those cases. But most other places in Manager aren't as forgiving, so remember to use .\ when in doubt.
Contributed by Matthew Olson
|
|
|
Report of the Month: Mapping
|
|
|
|
|
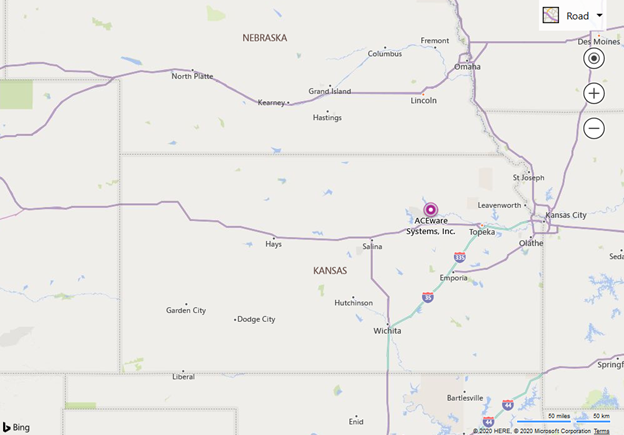
For some, this could be a revisit. For others, this is new info! During the conference, we utilized one of our own features to display the various institutes of attendees and their locations scattered across the US. There were a few questions about it during one of the lunchtime presentations. So here we go!
Mapping is a demographic report feature that you can use to display the pin map locations for students or firms who match a specific query. You can also run this from the course level quick reports as well, but your only option is to display students from there, not firms. There is some setup you will need to do, but it's quick and painless. The first step is to get a Bing Maps key, and the instructions are in our
online help guide.
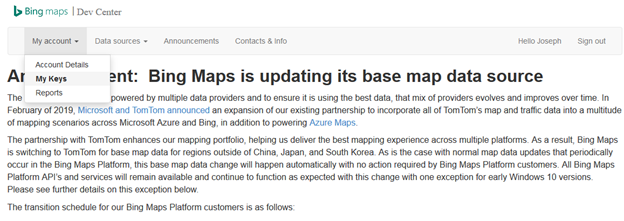
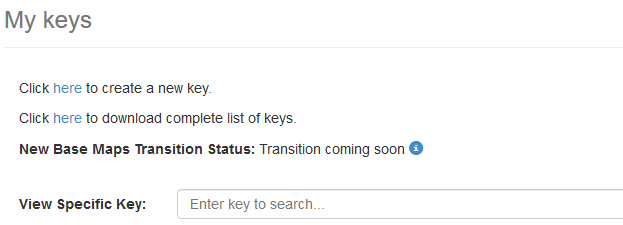
You'll follow the link from the help guide to get to Bing Maps, which will take you to bingmapsportal.com, where you'll be prompted to log in with a Microsoft account. After logging in, click on My Account>My Keys:
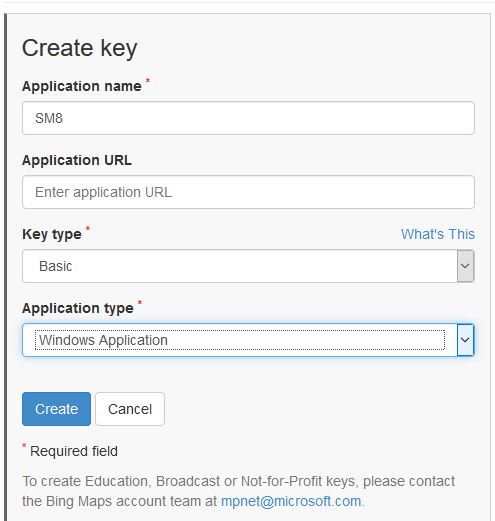
Create a new key, using similar info like this:
Click create, then you can copy out your key and put it in your Student Manager preferences (Note: Some browsers will not allow you to click the Copy Key button, so you might have to click show key to get the full string that you will need to copy to Student Manager).
This is a global setting, so it is strongly advisable to do this when all users are out of the system.
Once everything is in place, you can navigate
to Reports>Demographics>Mailing Labels>Additional Reports>Run your query> select the Mapping Report. (If you don't have a copy you can ask your technician or use your preferred mailing labels report and add JUSTAFTER("DO
MAPPING
") to the report.)
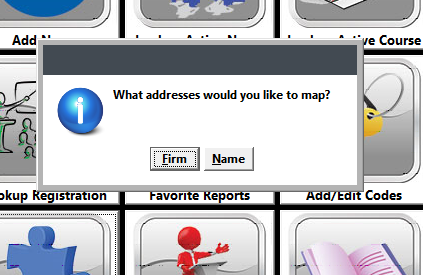
This is where you can select to display it as firm or name. It will then create the map item and open it in your browser and will look similar to this:
It will load in focused on one location, but you just need to zoom out to see others.
As always, if you have any questions or any troubles doing this, get with your tech and they will be happy to help you with it!
Contributed by Joseph Sotkovski
|
|
To your continued success!
- Chuck, Sharon, Cheryl, Jason, Joe, Lindsey, Matthew, Mike, Stein, and Susan
ACEware Systems
|
|
Catch up on the ones you missed
New help videos for Student Manager
|
|
Phone
Voice: 800.925.2493
Fax: 785.537.6811
eMail
Mail
ACEware Systems, Inc.
7480 Dyer Road
Manhattan, KS 66502
We appreciate hearing from you! If you have questions, comments, or suggestions about this newsletter, please contact [email protected]
.
|
|
|
|
|
|