|
Shower Pans Need Testing Too
|
|
Top Notch Home Inspectors are suspicious by nature, and this serves us well, especially when confronted with a tiled shower. The perfect example is the shower stall pictured on the right. At first glance it appears to be typical for its type and age. There often will be some minor grout deterioration and cracked tiles. But wait, there’s a minor stain at the ceiling below. Did someone leave the curtain out? Or run the toilet over? Or given what we know about tiled showers, does the stain suggest we need to be considering more troublesome possibilities?
|
|
|
|
The difference between a good inspection of a tiled shower and a disastrous one is what we look for, what we ask ourselves, and what inspection techniques we use to answer our own questions. Obviously a tiled shower can be as expensive to repair as almost any other component in a house. More than most metal, fiberglass or other prefabricated stalls, the repair of a leaking tiled stall can easily run $2,000. Those constructed of specialty ceramics or marble will have a much greater cost.
Removing tile, replacing the shower’s liner (the shower pan) and installing new tile can be just the beginning when these stalls leak. Shower pan repairs or replacements cost will run thousands of dollars for structural repairs, duct replacement and mold remediation work.
Noticing a stain on the ceiling, we need to ask ourselves about the possible source of the unwanted water. To find the answer eliminate all the plumbing fixtures in the bathroom other than the shower as the source.
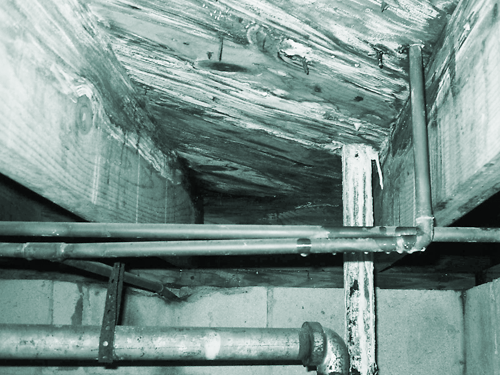
White crusty sediments and soggy wood sends a clear message to home inspectors. Often that’s how we know a shower pan is leaking into the crawlspace. Because these leaks are not often discovered before the damage is substantial, the signs practically cry out to us as we scoot along inspecting the crawlspace. But even when there isn’t this type of blatant evidence, the flooring below a tile shower requires our careful attention, especially the area around the drain. Leaks often show up first in the drain area.
|
|
ON A SLAB
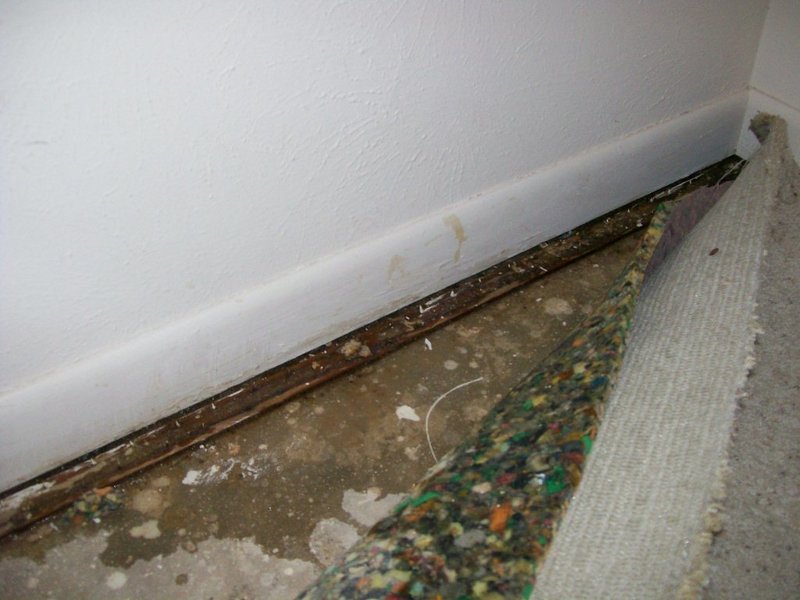
Shower pans above concrete slab floors also leak and will show up as staining on the baseboards or wood trim in nearby areas.
In addition to stains you might detect loose floor tiles in the bathroom or in areas sharing a common wall. If a closet backs up to a shower, check its lower walls and floor for signs of moisture. Don’t be afraid to ask to have things moved away from the common walls during the inspection. And when carpet covers the closet floor, check it also for moisture. If the carpeting is loose or you notice rusted out tack strips be aware this could be sign of a leaking shower.
|
|
|
SECOND FLOOR BATHROOMS
When a shower is on an upper floor, water stains on the ceiling below often can be mistaken for a defective wax seal or a misused shower curtain. Upper level shower leaks are usually spotted quickly by the occupants of the home, the structural damage is generally minimal. There are exceptions, of course. Minimal damage sounds like a good thing yet it can be problematic for home inspectors. The lack of visible damage makes it easy to overlook a leak. Be on the lookout for new paint under a second floor shower. Also be suspicious of new and of very old pans.
AGE OF THE PAN
Every tiled shower stalls deserves to be tested, but those with new pans or pans 30 years old and beyond seem to generate the most repair work.
Improperly installed new pans or liners damaged during construction will leak soon after being put to use so new construction must be checked also. Older pans tend to wear out. An old shower with a replaced pan is typically easy to identify from debris in the crawlspace and new plumbing below the floor. Without the benefit of a crawlspace, the pattern, style or sudden color changes in the tiles at the lower portion of a stall are also indicators of a replaced pan.
UNUSED BATHROOMS
Let your suspicious nature work for you when checking out tiled showers. Something as simple as no soap or shampoo in a stall or a missing shower curtain can be a red flag. Dried stains can indicate an absence of recent water, and all signs of lack of use should be taken into consideration. When you notice the shower is not being used, a quick check with the owner might trigger a sudden recollection of a past problem, hopefully that was repaired, making further inspection of the stall unnecessary.
|
|
|
READING BETWEEN THE LINES
While inspecting the shower compartment, look closely at the inside corners for large vertical cracks or separations where the walls meet. Loose grout is often washed from these areas, and depending on the quality of the workmanship and material behind the tile, the spray from the showerhead can be entering the wall cavity. Missing grout on the horizontal joints of the wall is also a reason to be concerned, and missing caulking can cause a substantial amount of damage if not repaired quickly and properly. These cracks or open joints are usually easy to repair, if caught early with some grout or caulking.
CHECK THE CRACKS AND THRESHOLDS TOO
Tight horizontal cracks or thin breaks in the tile across an entire wall are common especially in older shower compartments. Typical settlement, expansion and contraction of the structure, is most often the cause. In my experience, these are only a minor leak concern, but I recommend trying to determine if the tile sections above and below these cracks are loose. Use caution as you run your hand over these cracks as they may be razor sharp. If the edges are determined to be a “cut hazard,” note this along with your level of concern for the actual crack.
Typically when a shower pan has been replaced or repaired you will notice damage at the threshold. Also known as the dam, a combination of traffic, loose door trim and deteriorated tile work can make the threshold highly susceptible to damage. Inspect it well. If water has penetrated this part of the shower it will break down quickly.
|
|
|
HOW TO TEST
Experienced inspectors know to cover the shower strainer using a
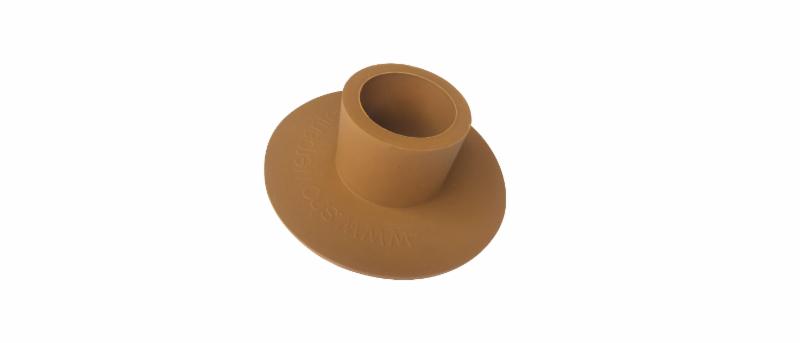
ShowenPanTester and add water to check the integrity of the shower pan. I would encourage inspectors to fill the shower to approximately 1 to 1 1/2 inches below the door threshold. Do this early into the home inspection, so the water has ample time to make its escape. Due to the unique design of the
you will save yourself from flooding the bathroom if you walk out while it is still filling up, yet we need to remember someone is paying that water bill.
With upstairs’ showers, periodically spot-check the ceiling below once the shower base is filled to prevent any major damage if the pan is leaking. But equally important, at some point a more careful visual inspection of the ceiling surface should be performed. Check it from different angles and with good lighting. This might expose hard to see stains and patches, which often is evidence of a developing problem or a previous one.
Always note in your report evidence of stains or flaking at the ceiling, and relate it to possible concerns about the shower above.
|
|
|
|
CHECKING THE OTHER WORKING PARTS
As for the faucet, check it for drips or leaks and note any loose escutcheons. If the shower arm is loose, point out how this increases the potential for a fitting leak. To avoid cutting the wall, plumbers often use a shower arm escutcheon with a setscrew as a temporary fix. By pulling the pipe up against the backside of the wall and tightening the setscrew on the front side, you can keep the pipe from bouncing around during normal use. It won’t eliminate the possibility that the fitting could be rung off when the shower arm and showerhead is being removed, so encourage your client to hire a professional for the job.
If a door is part of the fixture, check the hinges and hardware for soundness and proper function. This is important because broken hardware often creates unsafe edges. Doors and surround walls should be made of a safety glass or an equivalent, and doors should swing out into the room.
All the components of the shower plus nearby fixtures are considered if there are signs of unwanted water. Of all the components, the shower pan is usually the most difficult and expensive to repair. A review of shower pan basics explains why.
|
|
|
SOME SHOWER PAN BASICS
Unlike fiberglass, metal or other prefabricated shower stalls, most tiled shower compartments rely on an unseen liner installed between the tile and sub-floor to keep them from leaking to the structure
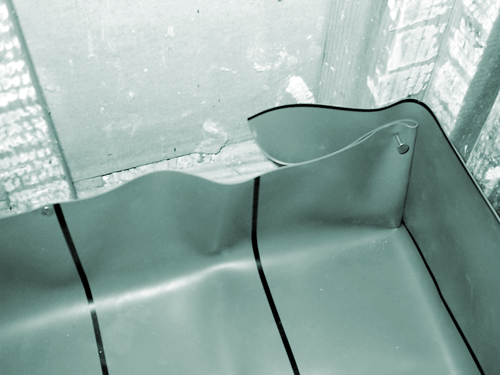
Today the sheet material is plastic, and pans are folded in place. A quality shower pan not only covers the floor area of the compartment, but also has sides that turn up 2 inches or more above the finished threshold level. The inside corners are folded, never cut; and the threshold is wrapped in the liner material with a folded overlap of about an inch on the front side.
|
|
|
|
In best cases, the floor area is sloped toward the drain opening. In some homes a concrete/mortar base is applied over the sub-floor, just below the pan, so the floor can be sloped toward the drain. But in many cases, perhaps to save time and money, the pan is installed directly over the sub-floor and only the drain area is tapered.
Another critical area in shower pan construction is the connection of the drain to the liner material. The fitting used for shower pans sandwiches the liner material between the top of the hub fitting and a bolted flange called a clamp ring. This portion of the drain has weep holes designed to direct penetrating moisture into the drain below the strainer plate. The drain fitting works best if recessed slightly below the rough floor.
On older showers, the drainpipe has been extended through the hub and is sealed with a lead caulked joint. Some later drains used a rubber compression ring to seal the joint. But for many years, newer fitting designs allow the drainpipe to be glued or banded directly to the fitting itself.
It’s important to note that the floors of all tiled showers are not lined. Though the walls of the stall may be tiled, some showers use a prefabricated base called a receptor, which is made of molded stone, terrazzo, plastic or another material. Liners are not a part of this design.
Occasionally, with slab construction, a monolithic pour of the building’s floor and a shower receptor is formed. When this is done, the receptor is usually recessed, and the user may step down into the shower. A cut-away view of this type of shower would reveal that the concrete receptor is poured directly over the soil and it is unlikely that a shower pan will be employed for this type of construction.
BEYOND THE SCOPE—LOCATING A SHOWER LEAK
Home inspectors who already perform other types of intrusive investigations could certainly handle this procedure, which can be used to help locate leaks on tiled lined stalls and all other types of showers. Using the proper tools will make your job easier and more efficient so it is recommended you use the
ShowerPanTester.
FINAL STEPS
Finally, leaks to any of the shower’s components discovered during the testing procedure should be considered as a potential source of the unwanted water, and not until the entire process is completed should the shower compartment be given a pass. If no leaks are discovered, other fixtures nearby should be checked out. Ceiling leaks can originate from a number of other sources but the purpose of the testing procedure is to help eliminate the expensive repair of a shower pan leak.
|
|
30% OFF ON
TESTERS
USE CODE - MULTIPLE
|
|
|
|
|
|
|
|
|
|
|