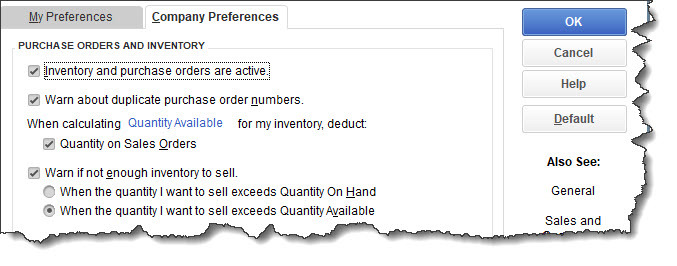
QuickBooks has several options for dealing with inventory. You should check your Preferences before you start entering sales.
Haven’t started creating item records yet? We can help with that if you have questions about how QuickBooks handles this. In fact, we encourage you to contact us about this critical process, because some of the records’ fields may be foreign to you. If you want to try it on your own, open the Lists menu and select Item Lists. Click the down arrow next to Item in the lower left corner and then click New. The New Item window will open.
Since you’re going to be building assemblies, you have to create records for all of the products that will be included. So choose the Inventory Part option under Type. Complete the rest of the fields here and click OK.
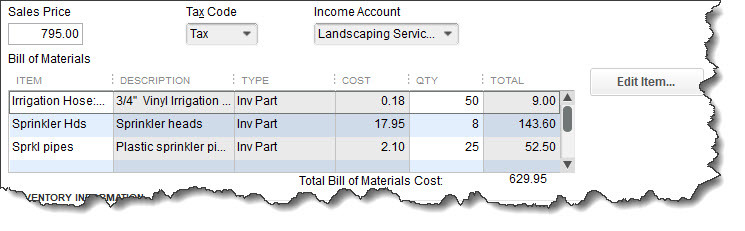
Once you have enough product records created to start building assemblies, go through the same steps you went through to open the New Item window. Rather than selecting Inventory Part under Type, though, click on Inventory Assembly. Instead of defining a single item in this window, you’ll be choosing the components that will be included. This is your Bill of Materials.
You won’t have to complete every field in this window, but several are required. Give your assembly its own Item Name/Number. Then, so you know what you’ll be pricing, jump down to the Bill of Materials window and select the items that your assembly will include in the table provided. If you completed all of the fields in the product records, QuickBooks will fill in the other columns on each line except for quantity (QTY), which you must enter.