A narrow border cut from a large black-and-white dot seemed to contain the wild blocks. I didn't realize until I cut the strips that the dots weren't printed straight. Who knew.
Ready to make your own Japanese X and Plus block? Here's how:
I'm going to give you the size of the cut pieces and let you figure out how much you need for the number of blocks you plan to make. I suggest a scrappy quilt, but with the same background to calm things down.
For a nine-block quilt, you'll need ½ yard of background fabric. That assumes no cutting errors, so I would get 5/8.
Cutting for one block, 12½" square:
For the "X" units, cut:
4 squares 5½" x
5½"
For the background, cut:
8 squares 3" x 3"
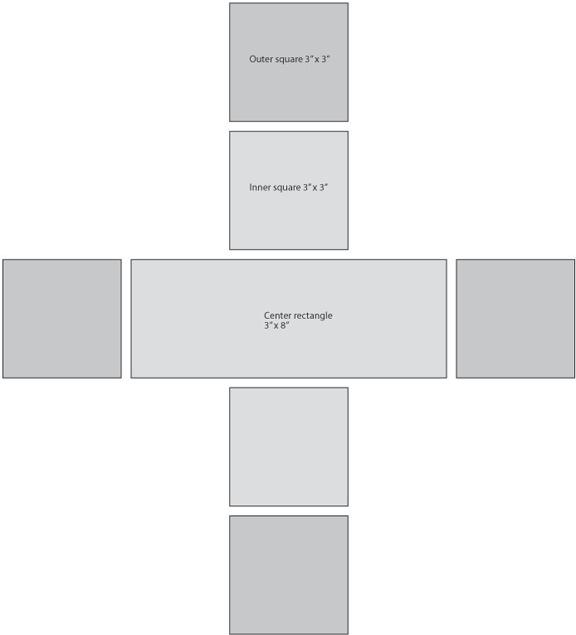
For the "Plus" unit cut:
2 squares 3" x 3"
1 rectangle 3" x 8"
From another fabric, cut:
4 squares 3" x 3" for the outer squares
Making the X units
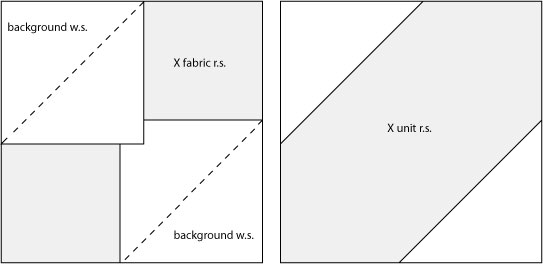
Sew 2 background squares to a 5
½" square as shown. Trim the excess at the corners, leaving a
¼" seam allowance. Open out the pieces and press the seams (and all seams) open. Make 4 units.

Making the plus unit
Sew an outer square to each end of the center rectangle. Then join the outer and inner squares.

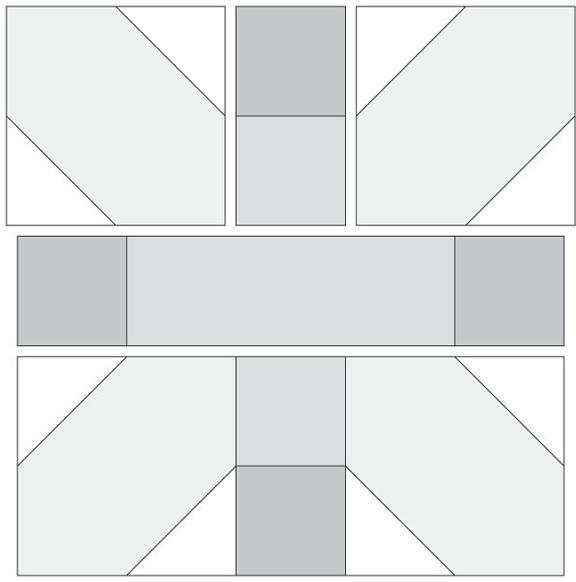
Sew the units into horizontal rows as shown.

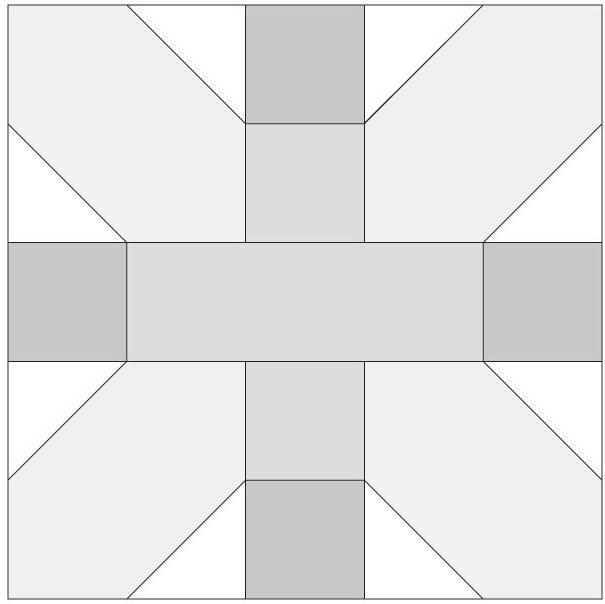
Ta da! Your finished block.

I hope I haven't worn you out, rather that I've inspired you to make a few (I dare you to make just one) Japanese X and Plus block.
My YouTube channel with tutorials is coming soon and I'm so excited. In the meantime, enjoy the rest of your summer, and keep cool, perhaps with a bowl of spumoni? Ciao!