Knit Fit
Using a Personal Sloper
Below are step-by-step directions that will make finishing and using you personal knit bodice sloper very easy.
A Personal Sloper Assures A Great Fit Every Time!
Step 1.
Once you have transferred any alterations from the muslin to the pattern, make a clean fresh copy of your personal knit T-shirt sloper created using CS1207.
Print all important info on pattern pieces: Name, date, all seam and hem allowances and so on.
Step 2.
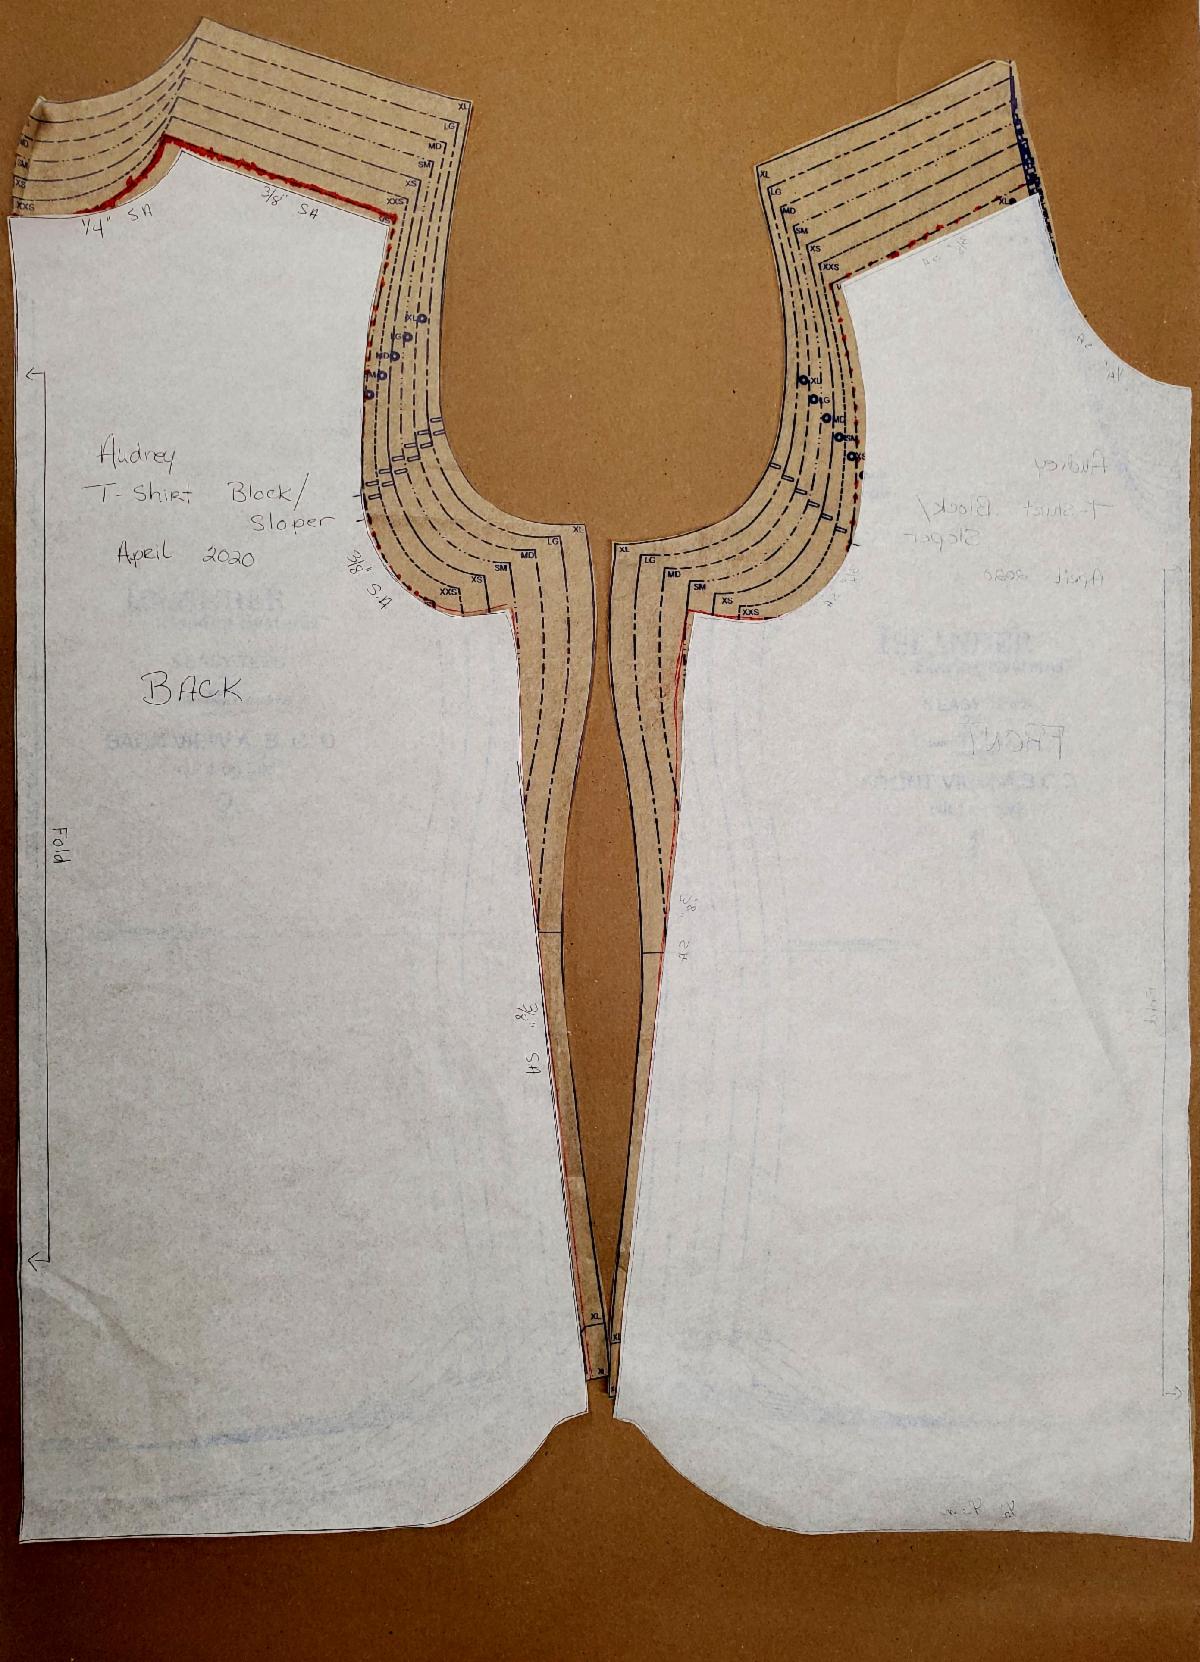
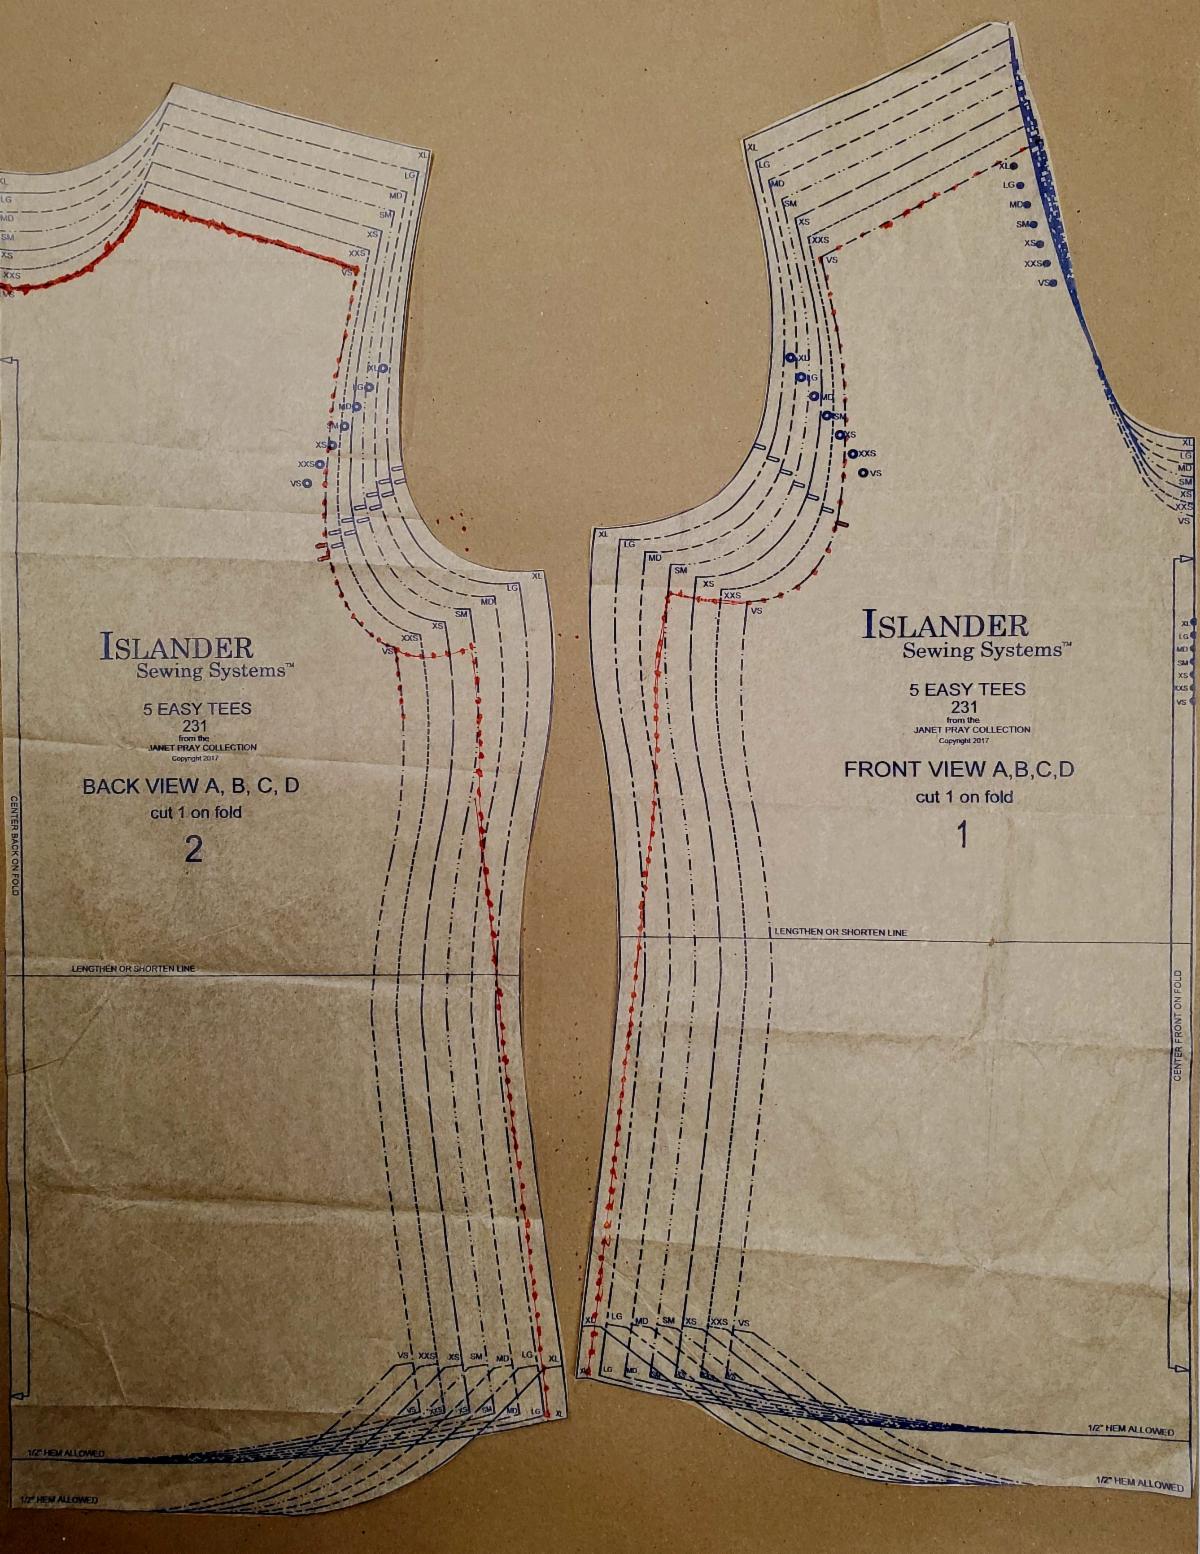
Lay the sloper on top of the commercial pattern aligning the straight of grain lines (keeping grainlines on both patterns parallel). In these patterns the fold line is the straight of grain. Find the best fitting size; in this example its VS in the upper body above the bust grading out under the arm and continuing out all the way to the hem. Once everything is aligned and level trace around the sloper.

When deciding which cutting lines to follow, the sloper or the pattern, take these two things into consideration.
  1. How will the change impact the fit?
  2. How does the change imapcts other pattern pieces?
Step 3.
Below it's easy to see the changes needed. Cut out the pattern on the new (red) lines or trace them to create a fresh pattern.
Final Pattern Ready to Sew
The Fresh pattern should also be labeled with important information.

Note: In this example it's perfectly fine to use the original sloper sleeve as it will fit the armscye without additional alterations. That will not always be true.
Tuesdays at Two
This Week on Tuesdays at Two, Janet Pray will conduct a brief discusion on using the sloper with commercial patterns. Then we begin the Fitting a Woven Bodice series. Hope to see you then!
Woven Bodice Fitting Kits
3 Kits Available
As you know at Islander Sewing Systems we like to make everything easy. So once again we have created 3 different size kits with all the supplies you need to create a woven bodice sloper - each has been discounted by 20 to 25%.


All supplies are also available for purchase separately.