|
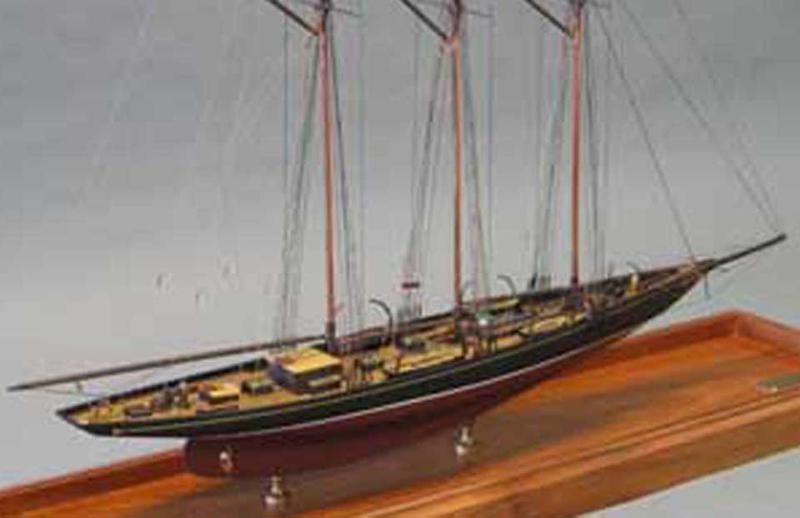
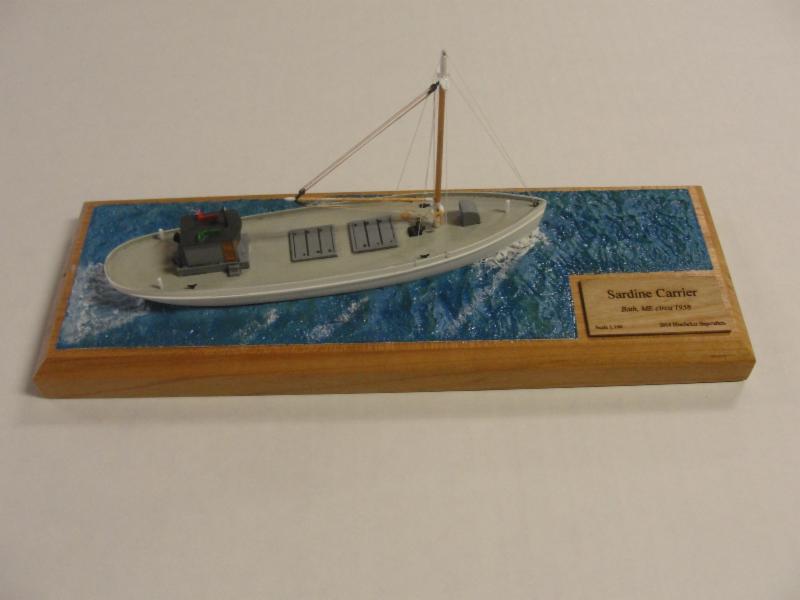
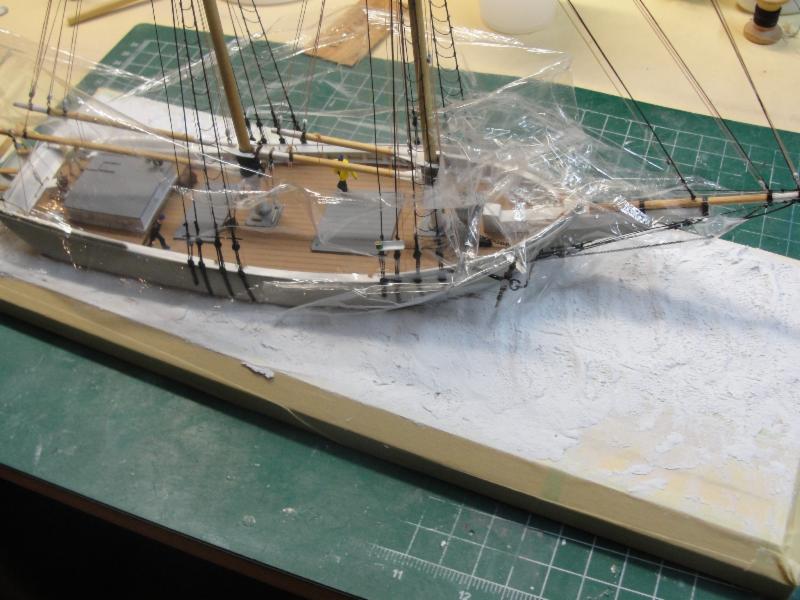
Recently we built a small model for a customer and set it on an ocean base, as you can see above. Needing to do another one for a different model, I thought it would make a good tip to see the process step-by-step. Of course there are other ways to do this, but this way looks pretty good I think.
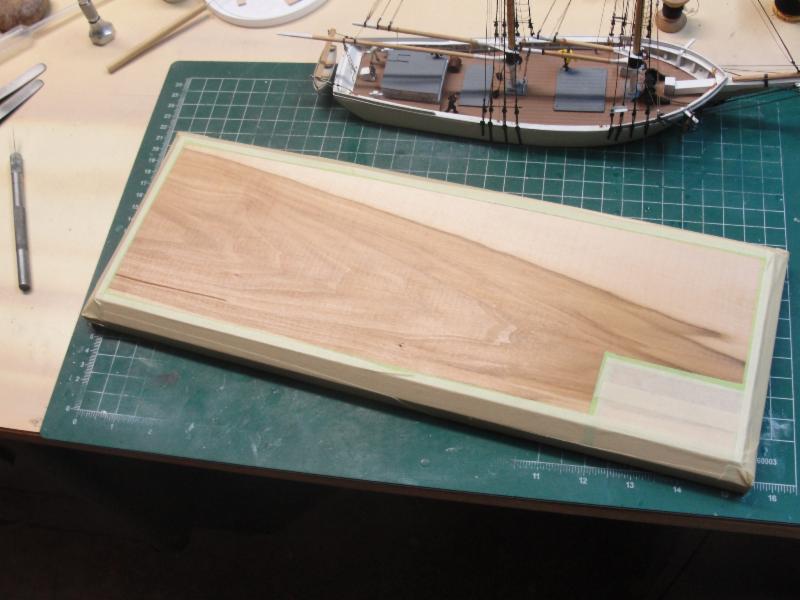
First, you need to position your model and anything else (like a nameplate) on the base where you want them to be. Try different positions, angles, etc. until you are happy with the look.
The next step is to mask off the areas where you do not want the water to be. SInce we will be using spackle, you don't have to worry about anything bleeding under the tape edge.
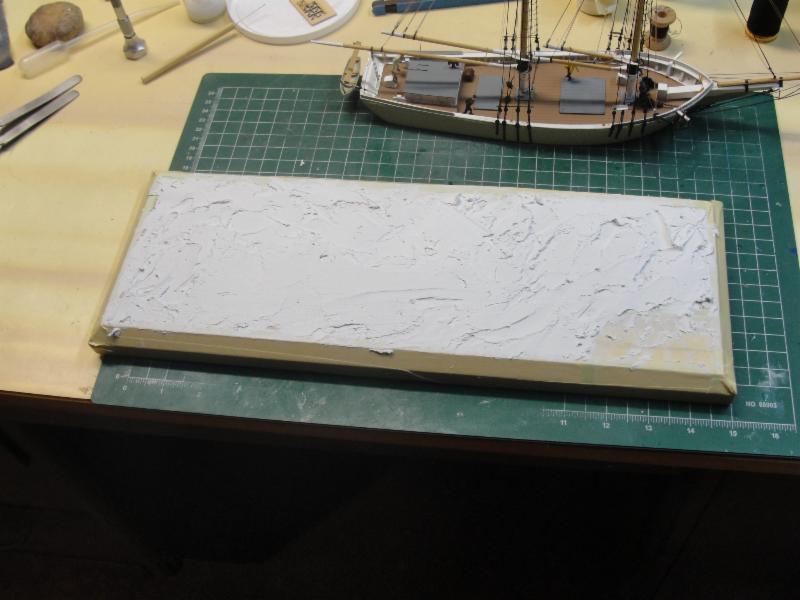
OK we're ready to start. Get a craft stick and slather on some spackle. I use a lightweight version that "doesn't shrink." You don't have to be neat, just get enough on there to barely cover the base.
Now use that stick with a very little water to cover the base. Don't worry about waves just yet, just get it covered.
Now we make waves! Put on a disposable glove, wet your fingers a bit, and tap on the base. This will make troughs, peaks, and small ripples. Remember, it's only spackle. If you ruin it, scrape it off and try again. Eventually you will get a wave pattern that pleases you.
Once you are happy, take your waterline model and wrap the bottom in Saran Wrap, then place it firmly where you want it to be. Then, just walk away and let the spackle dry!
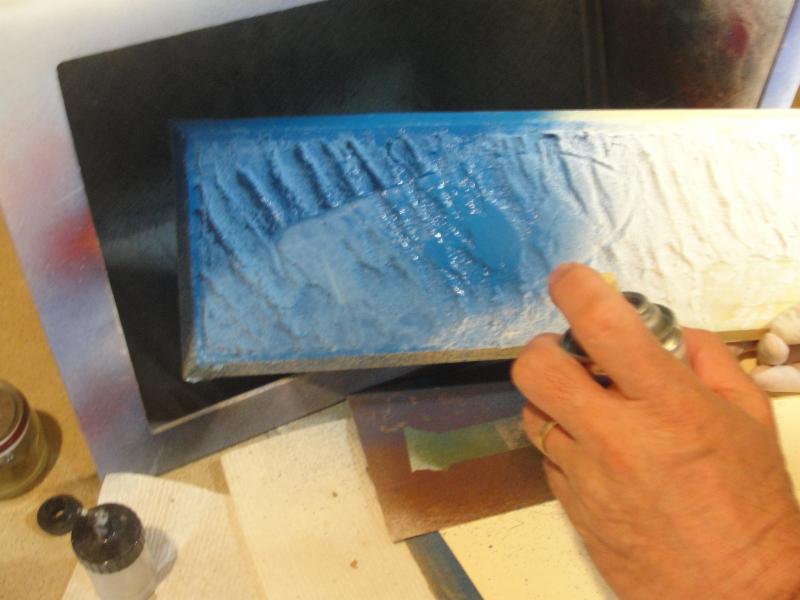
OK, spackle is dry, you pulled the model off, and now we start with some medium blue spray paint. Makes no difference if it is flat or glossy, just get a nice even layer of paint. You will notice that the spackle soaks up the paint and it changes color a bit. That's OK.
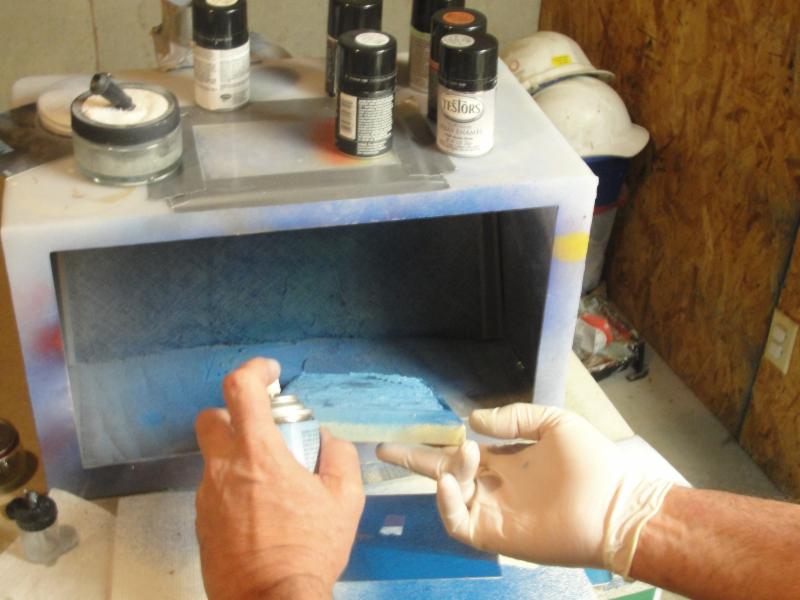
Now for the secret steps: Take LIGHT blue paint, and dust the waves in one direction only at a very shallow angle like you see here. Go gently, and check your progress. You don't want the light blue to be even, but just noticeable on some of the wave fronts.
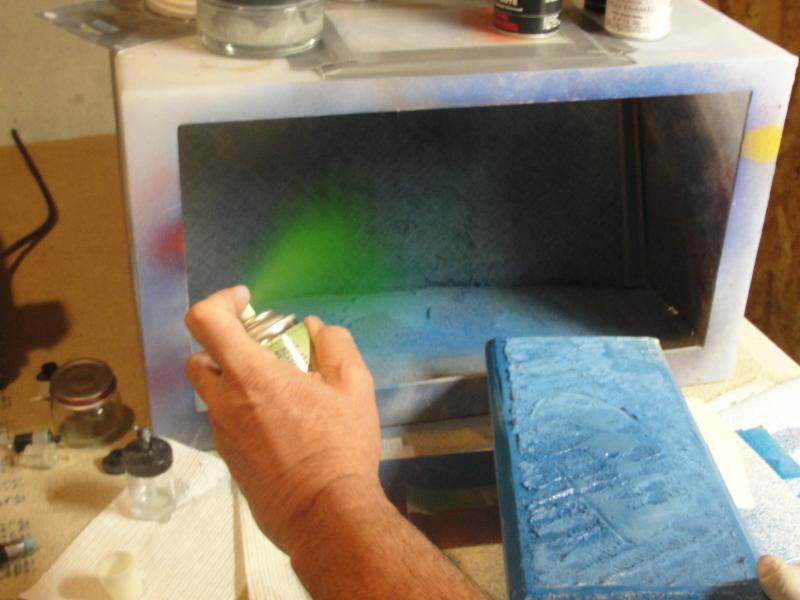
Now the killer step: in the OPPOSITE direction, spray green paint, again at a shallow angle and very sparingly. At this point, to err with less paint is better than too much. I think you will be pleased with the way the colors play off each other.
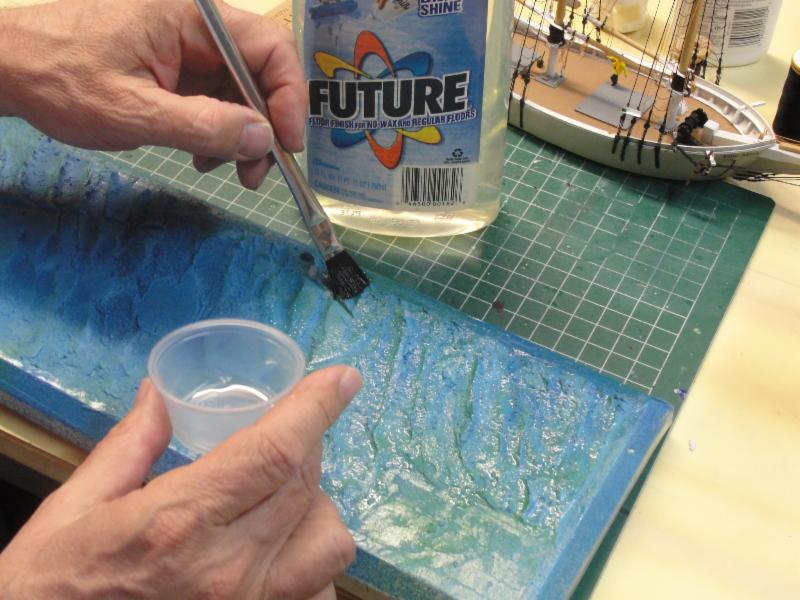
After the paint dries, the water will look dull and unappealing. That's because real water is, well, wet and shiny. A really great way to get that shiny look is to paint it with Future Acrylic floor finish. My bottle is about 10 years old, the current name is Pledge acrylic floor and tile finish, or something like that. Let the first coat dry, then apply a second coat.
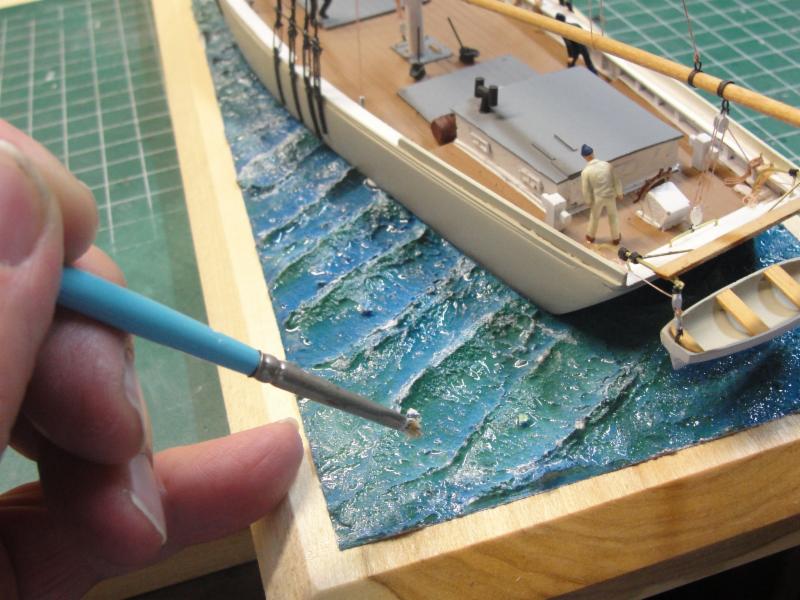
After that coat dries, strip off the masking tape, and glue your model down (I use silicone bathtub calk) and get out an old paint brush. Dip it in flat white paint, then wipe most of the paint off the brush. dab the brush onto the wave tops, adding a little at a time. Big globs of white do not look real. If you are modeling windy water, like I am here, the waves are pretty high (remember the glove step?) and I'm adding a decent amount of whitecaps with this technique.
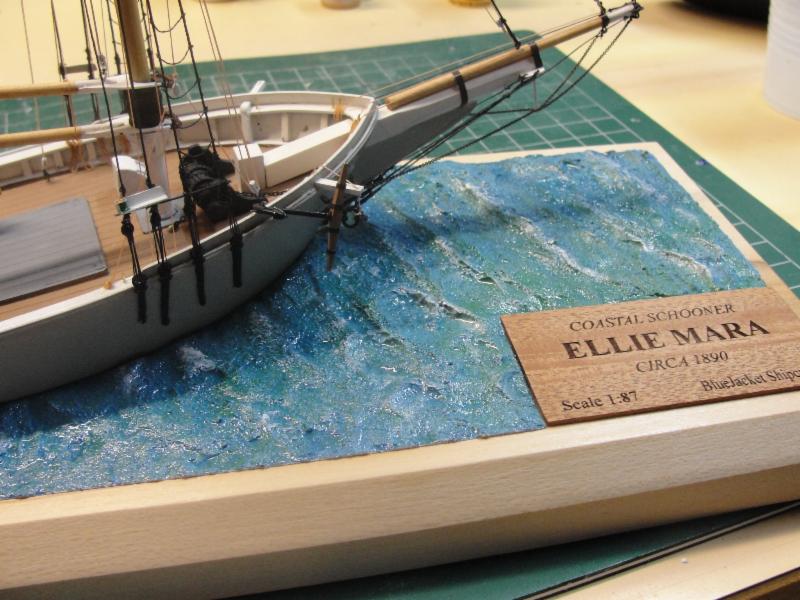
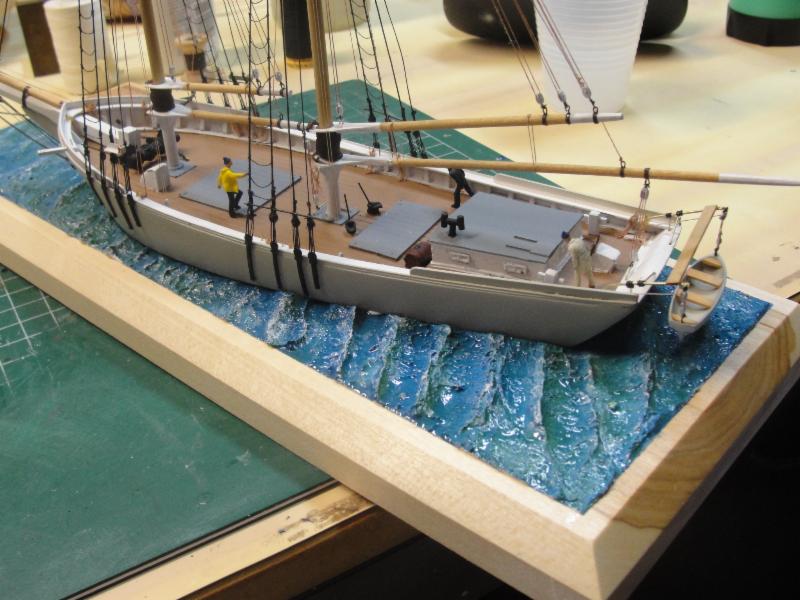
And here's the bow and stern view of the finished product. You can see all the colors that were applied, and the water looks "wet." That's all there is to it!
|