|
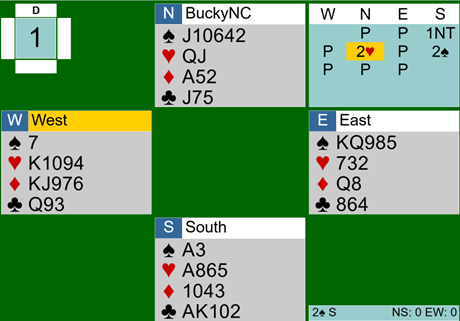
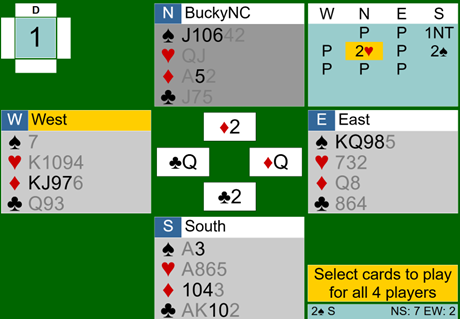
W then led her ♦K. Dummy and Partner both have to follow suit, but E must ruff in. Now she was end-played. All she could do was cash her winning spades, leaving Dummy with the highest spade on the 13th trick.
Well done, Partner!
There are two keys to the hand: (1) not to draw trumps and (2) pitch a loser on loser when possible—a fascinating element of my partner’s declarer play as he made two loser on loser plays.
The first key—when not to draw trumps—is a lesson we don’t get in bridge classes until very, very late, if at all. If Declarer tries to draw trumps on this deal, he will potentially lose 4 spades. Declarer could also go on to lose 1 heart, 2 diamonds and 1 club. It will not be possible for the defense to collect all 8 of Declarer’s potential losers. But those losers are out there, lurking, waiting for good defenders to get as many as they can if Declarer makes a misstep.
With perfect defense and declarer play, the only way of setting 2♠ is for W to make an opening lead of a diamond. Good luck finding that. But, as you can see, the deal was complicated enough for there to be little chance of perfect defense and perfect declarer play. Both sides could go wrong at any number of points, regardless of the opening lead.
With one secret to this deal being not to draw trumps, those E’s who doubled 2♠ alerted Declarer to the bad split. That warning allowed two pairs to make their doubled contracts for a top board.
So, how does one know not to draw trumps? I am not aware of books, or chapters of books, which teach it. On occasion deals in the Bridge Bulletin illustrate it. But the way many of us learn about it is by either drawing trumps on a specific deal and regretting it deeply, and/or watching a good Declarer not draw trumps and bring home an iffy contract.
The latter method requires you to be alert to what happens at the table. After all, your entry fee is not just to let you play; it includes possibilities to learn from those you play against.
|