THIS WEEK'S FUN LEARNING AT HOME
For this week’s activity let’s learn about fossils! 
Fossils

A fossil is a trace or record of ancient life. Much of our plant knowledge from the times of the dinosaurs comes from fossils. 

Let’s recreate the process of plant fossils with this activity!

  • In order to make fossils, we’ll need two things:
  • air dry clay and
  • a plant part!


If you don’t already have air-dry clay,
you can make a simple homemade version!

Homemade Clay Materials:
  • 2 Cups Baking Soda (1 box)
  • Cornstarch
  • Water

Step 1 – Mix

In a pot, mix all three ingredients together.
Step 2 - Heat

Heat the mixture on a stovetop at medium-low to medium heat, stirring constantly.

When the mixture looks like mashed potatoes and all the water has been absorbed, remove from heat!

Step 3 – Let It Cool

Make a dough ball and wrap it in a damp towel.  Let it cool for about 10-15 minutes.

Step 4 – Knead

Knead your dough until it’s smooth and silky.  

It’s now ready to use!

Keep this clay in an airtight container if you plan on using it later!
Fossil Imprints
Materials:
  • Air-dry Clay
  • Plant Parts
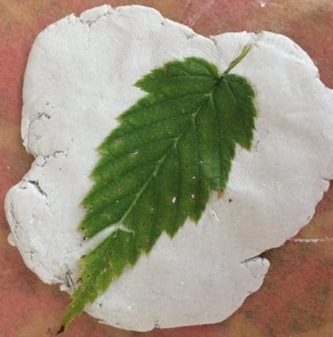
Step 1 - Gather Plant Parts

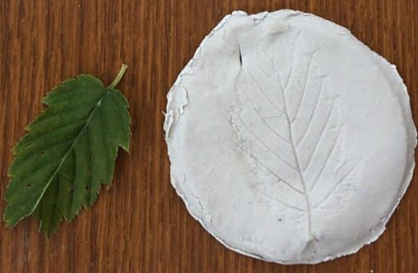
Head outside and find some small leaves, flowers, or other interesting plant parts in fun shapes!  

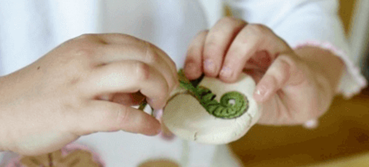
At this time of year, ferns are just starting to emerge and they make excellent imprints!  

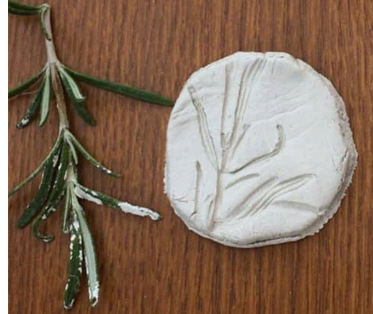
Pine branches, birch catkins, even bird feathers work well if you’re feeling adventurous!
Step 2 - Make a Clay Cookie

Take a small ball of clay and flatten it to make a cookie shape. 
Step 3 – Press

Take your plant part and press it into the clay cookie. 

If you’re using a leaf, press the vein (back) side of the leaf into the clay.
Step 4 –
Remove Leaf (optional)

You can remove the leaf or plant part to just have the imprint, or leave the plant part in the clay to decompose and dry out naturally.  

It will fall out of the clay imprint just like a natural fossil process!
Step 5 - Dry

Let the clay sit for at least 24 hours to dry.  

Quick tip: To prevent cracking, loosely wrap the clay in a plastic bag to slow down the drying process!
Step 6 (Optional) -
Color

Your can color your new fossils with markers or paint for a fun and creative touch!
Continue to watch for our weekly fun activities for all ages to enjoy!